
Zinc Plating + Black Chromate
The used front calipers had no rust, but the plating had faded and was peeling in places, so I decided to refurbish them.
The first surface treatment I considered was replating.
The factory calipers appear to have black chromate over zinc plating. I found a company that accepts work from private customers and requested a quote. Stripping the old plating, zinc plating, and applying hexavalent black chromate came to an estimated 44,000 yen for the left and right pair, excluding shipping.
An appearance matching new factory calipers would be nice, but the black chromate layer is surprisingly fragile and fades or peels with age. In fact, I have never seen a car whose calipers have retained that glossy jet-black finish.
The price was higher than I expected, but durability was also a consideration, so I decided to explore other options.
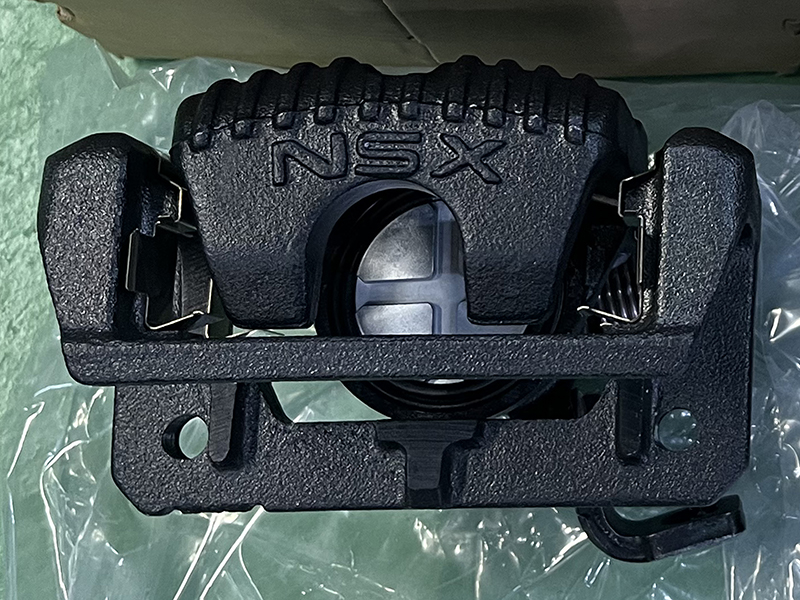
Factory plating on a new rear caliper
GUN-KOTE
I had been interested in GUN-KOTE for some time.
It is a single-component coating that forms a strong film when baked at high temperature.
Watching durability tests on YouTube and elsewhere showed that it was very tough, so I decided to try GUN-KOTE in the hope that it would retain its sheen for a long time.
GUN-KOTE is available from
CARVEKopen_in_new
and can be purchased through its online store.
- I would not know for sure until I applied it, but I thought a black with a little less sheen would be close to black chromate, so I chose the color "Flat Black."
I chose the smallest size, 500cc. It cost 8,690 yen including shipping.
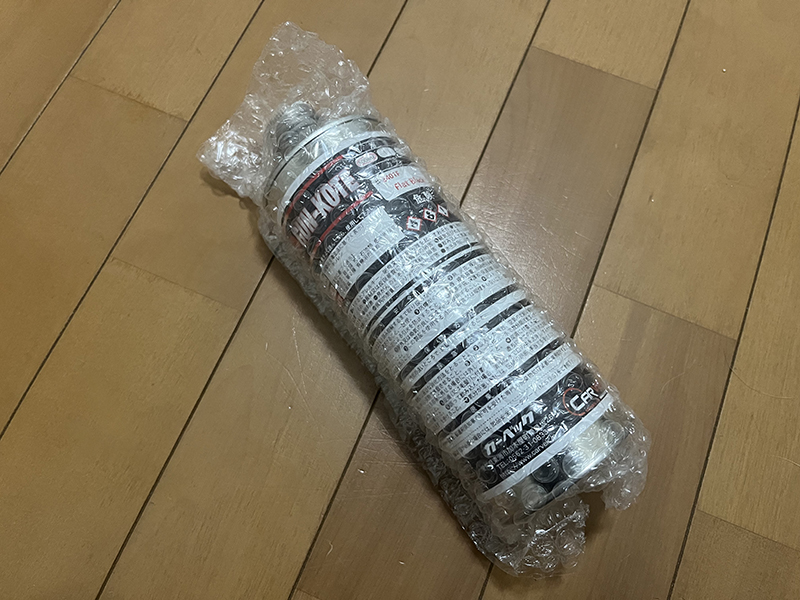
Benchtop Blast Cabinet
To improve GUN-KOTE adhesion, the surface needs to be stripped back to bare iron, so sandblasting is necessary after all.
I once owned a steel blast cabinet, but rarely used it and eventually got rid of it because it was in the way. Learning from that experience, I looked for the smallest suitable cabinet that would fit the parts I planned to coat with GUN-KOTE.
- I bought the IRII TR-313SB lightweight benchtop blast cabinet. Its resin body makes it a very light, compact cabinet that is easy to carry.
The manufacturer lists the cabinet weight as 8.4kg, but it feels very light when lifted, and it looks as though carrying it with a reasonable amount of blast media inside would be no problem.
Besides being easy to put away when not in use, it can also be taken somewhere with a large compressor.
I bought it new on Yahoo! Auctions for 14,588 yen including shipping.
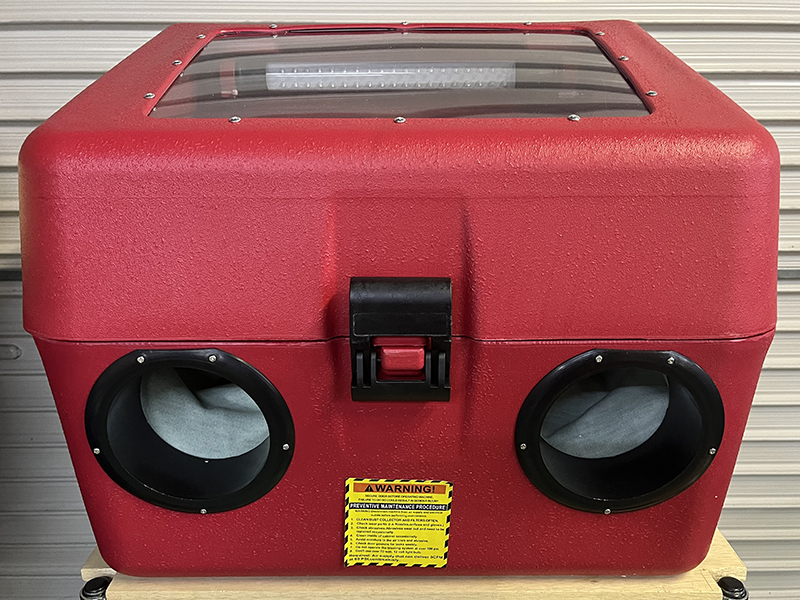
IRII lightweight benchtop blast cabinet
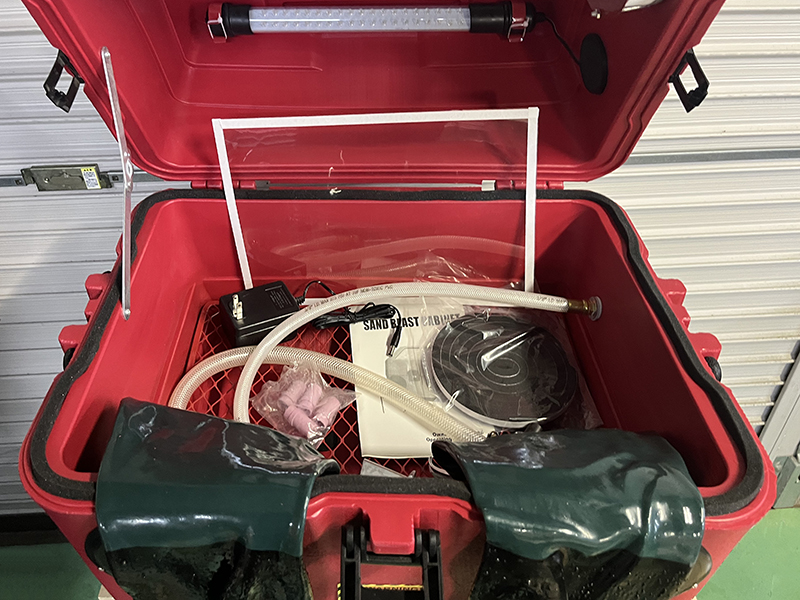
IRII blast cabinet accessories
- The accessories are packed inside the cabinet.
They include a blast gun with a media pickup tube, four nozzle sizes (4, 5, 6, and 7mm diameter), spare protective window film, cabinet seals, and other items.
An LED tube light is fitted inside, and its AC adapter is included.
The external connections are grouped high on the right side of the cabinet: an air inlet (1/4PT), an AC adapter jack, and an exhaust vent.
The air inlet is simply a female-threaded port, so a plug to suit the air hose must be purchased separately.
An air filter inside the vent prevents dust from escaping, but it quickly clogs when a vacuum cleaner or similar device is used for dust extraction, so it looks as though it needs to be removed for that use.
Curing Oven
Baking at the specified temperature is an important step in applying GUN-KOTE.
Online, I found that some people bake it by blowing hot air from a heat gun into a sealed box. However, temperature control seemed troublesome, and I wanted to bake it properly at the temperature specified by the manufacturer, so I bought an oven.
There are plenty of used ovens on Yahoo! Auctions, Mercari, and similar sites. Since only the oven function is needed, a faulty unit with, for example, a broken microwave function can be bought very cheaply.
Well-used examples are also inexpensive, but I did not like the idea of a dirty oven cavity, so I bought one in reasonably clean condition.
- I bought a Hitachi MRO-VS7, with an oven cavity measuring 295mm wide by 316mm deep by 220mm high.
It cost 11,000 yen including shipping on Mercari.
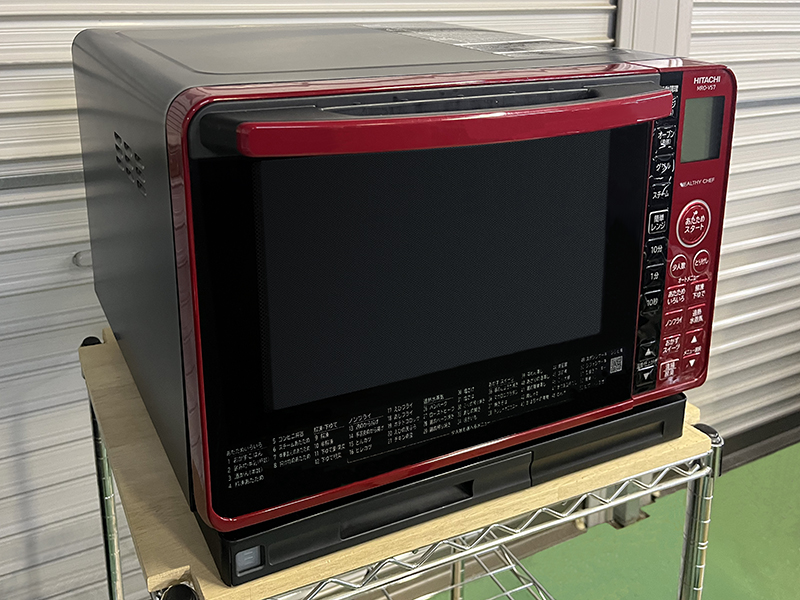
Hitachi MRO-VS7 combination microwave oven

Condition of the oven cavity
- When the combination microwave oven arrived, I checked the cavity and found it far cleaner than the one I use for cooking, almost making me feel bad about dedicating it to coating work.
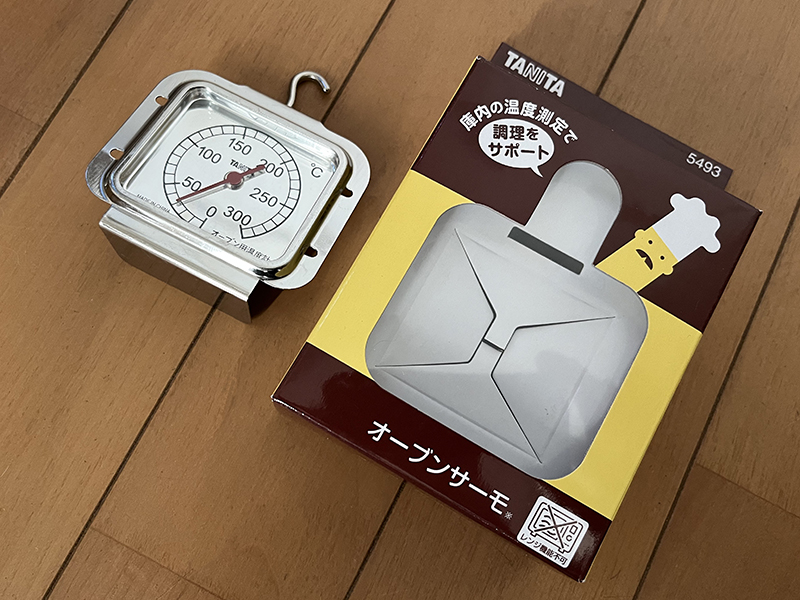
Tanita Oven Thermo 5493 thermometer
- I also bought an oven thermometer so I could at least check that the oven was heating to the set temperature. I bought the Tanita Oven Thermo 5493 for 1,027 yen including shipping on Amazon.
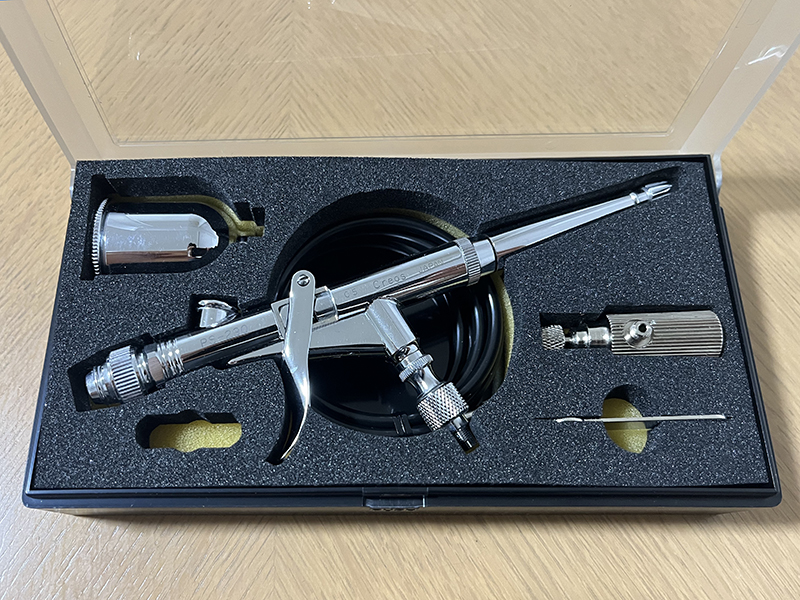
Purchased Creos PS-290 airbrush
Creos PS-290 Airbrush
When spraying GUN-KOTE, nozzle diameter matters. An excessively large nozzle apparently causes poor atomization and an overly thick coating, leading to bubbles.
The manufacturer recommends a nozzle diameter of 0.4-0.6mm.
Spray guns with small nozzles are available, but since I would not be coating large areas, I decided to buy an airbrush.
- After comparing airbrushes with nozzle diameters within the specified range, I bought a used Creos PS-290 with a 0.5mm nozzle. It cost 8,330 yen including shipping on Yahoo! Auctions.
The OLYMPOS HP-74D, with its 0.4mm nozzle, seemed reasonably priced and widely used, making it a strong candidate. However, OLYMPOS was no longer in business, so I chose Creos for greater confidence in the supply of maintenance parts and similar support.
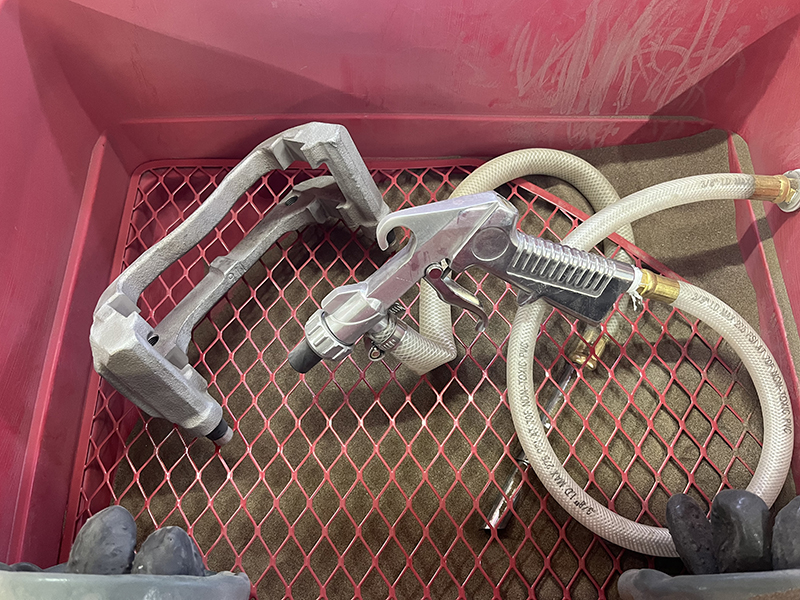
Sandblasting the brackets
- I started by sandblasting the brackets.
I used #120 alumina media and bought about 10kg.
The chromate layer comes off quite easily, so even a low-output compressor can strip it without too much difficulty.
The underlying zinc plating is hard to distinguish from bare iron, so it is difficult to tell how much actually remains.
I thought GUN-KOTE adhesion should not be a problem even over zinc plating if the surface was properly prepared, so I considered it sufficient to remove the chromate layer and thoroughly clean off any oxidation.
Blast gun nozzle size should normally be chosen to suit the available air supply. However, the smallest 4mm nozzle picked up hardly any media, while larger nozzles picked it up better.
I suspect a small nozzle creates greater resistance at the outlet, preventing sufficient vacuum from developing to draw in the media.
A larger nozzle reduced the time I could blast continuously, but it drew in the media properly and made the work go faster. I therefore ended up using the largest, 7mm nozzle as my regular choice.
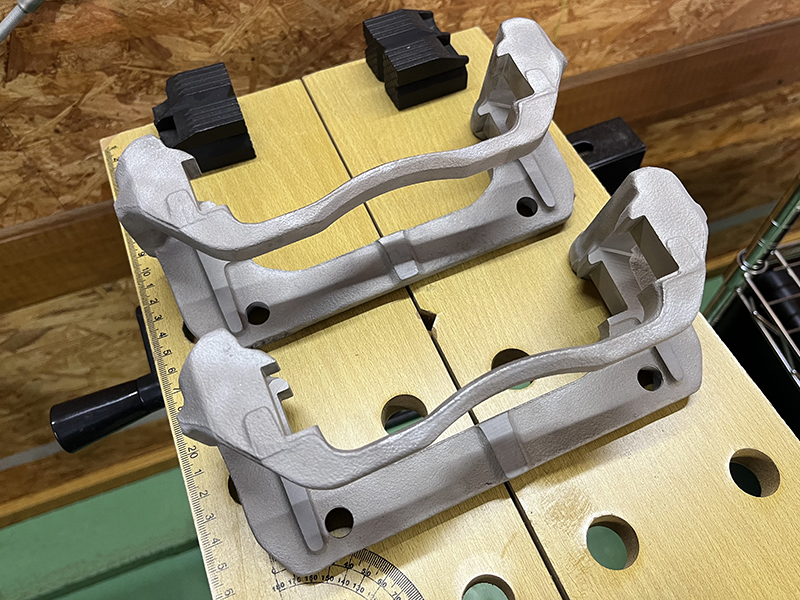
Bracket sandblasting complete
- With my low-output compressor, each bracket took about an hour. I masked the bores that accept the slide pins, leaving their chromate intact.
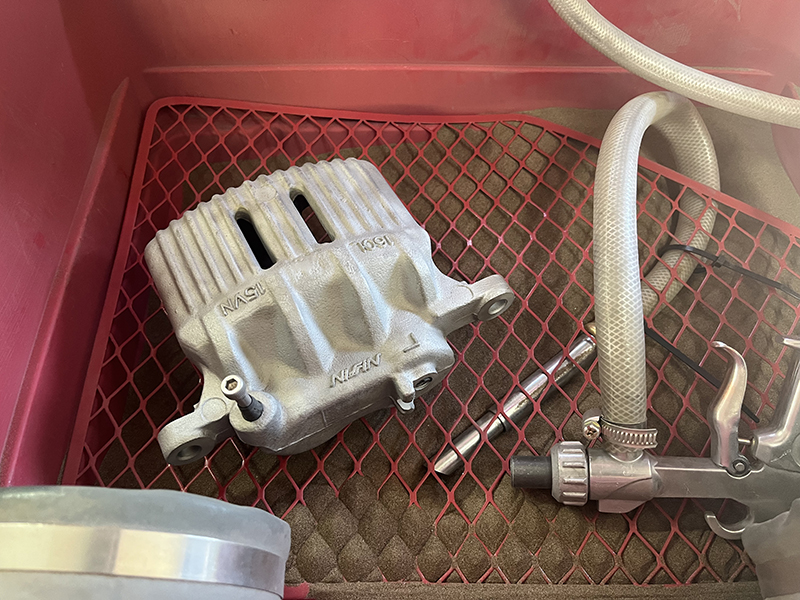
Sandblasting the calipers
- Next, I sandblasted the calipers.
One caliper seemed to take as long as both brackets together. I masked the cylinder bores, leaving their chromate intact.
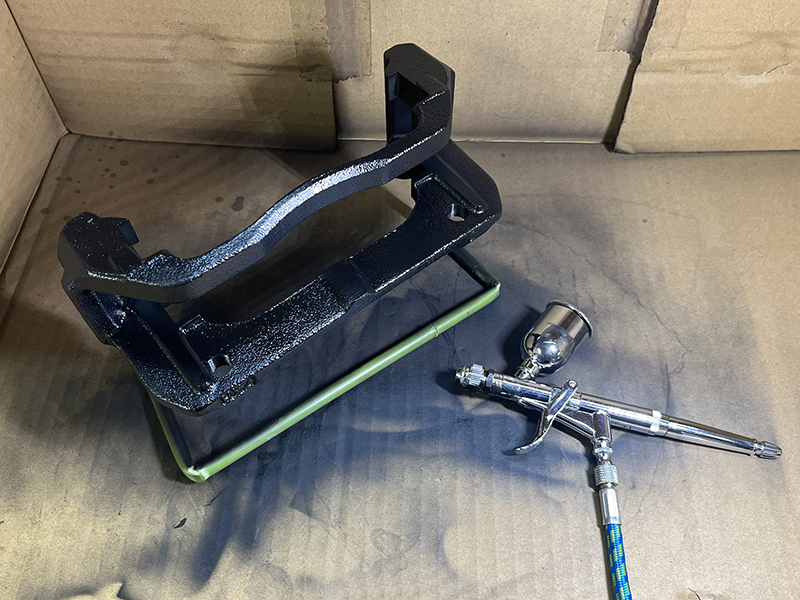
Applying GUN-KOTE to the brackets
- I painted the brackets first.
I bent a garden stake into a painting stand.
The finish is quite glossy immediately after spraying.
With matte colors, insufficient mixing leaves pigment settled out and results in excessive gloss. After the can has sat for a few days, the mixing ball no longer rattles when shaken, so it needs thorough shaking to mix the contents (the manufacturer states that 10-15 minutes of mixing is required). - GUN-KOTE application is complete on both brackets.
I bought a kitchen rack from Daiso thinking it would be useful for drying, and was surprised to find that its hook spacing matched the bracket hole spacing.
It looks like a purpose-made stand. - Painting the calipers.
I first placed each caliper on a flat surface to paint the intricate areas, then hung it from the stand to paint the rest.
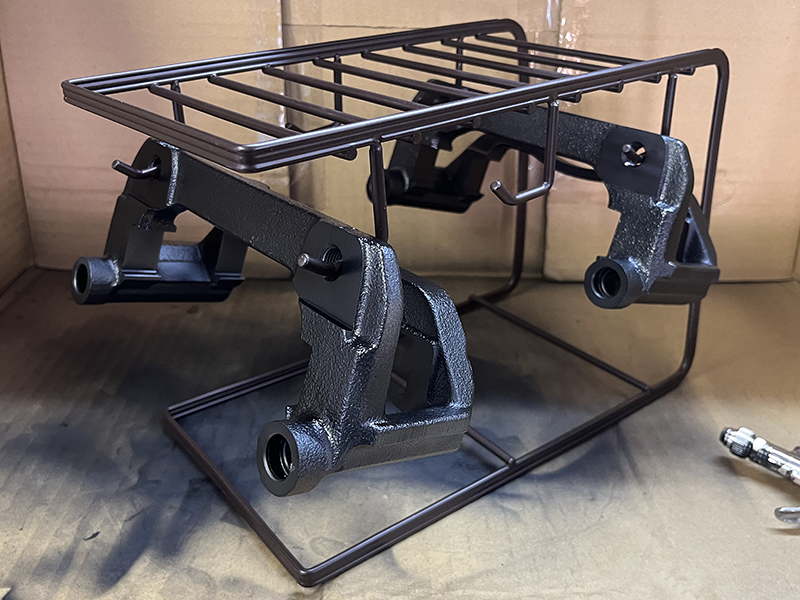
Bracket GUN-KOTE application complete
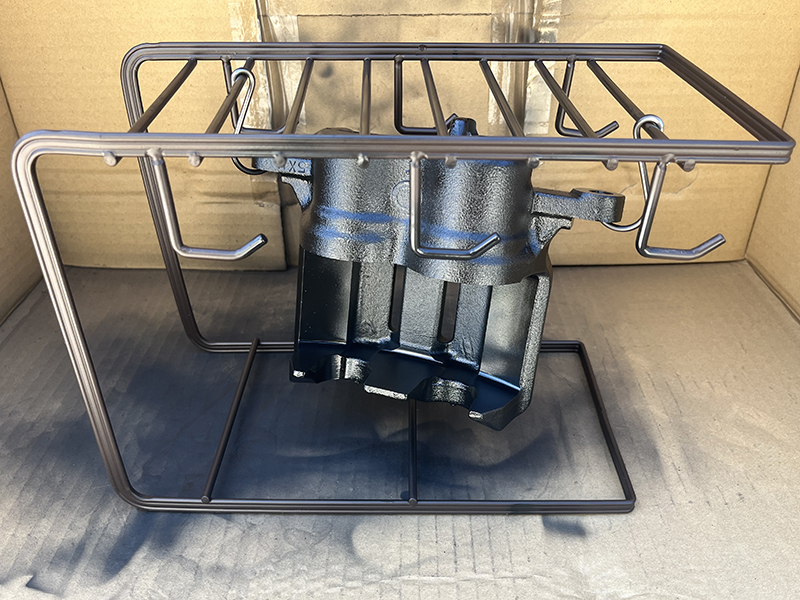
Applying GUN-KOTE to the calipers
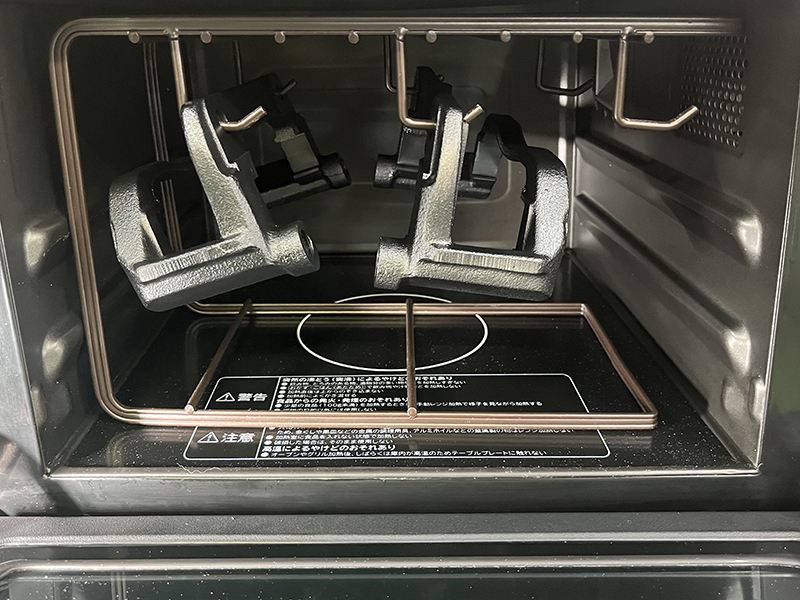
Oven-baking GUN-KOTE
Pre-bake: 30 Minutes at 100°C
- I started by baking the brackets.
While considering how to arrange them in the oven, I had a second surprise: the Daiso kitchen rack was exactly the right size for the oven cavity.
Semi-gloss colors are said to be more prone than other colors to solvent bubbling if heated rapidly during baking. The manufacturer therefore explains that a pre-bake at 60-80°C for 30-40 minutes before the main bake lets the thinner evaporate gradually and prevents bubbling.
I only realized this after buying the oven, but its temperature could not be set below 100°C. It seems that few ordinary cooking ovens allow temperature settings below 100°C.
Looking online, I found that others apparently pre-bake at 100°C for the same reason, so I decided on a 30-minute pre-bake at 100°C.
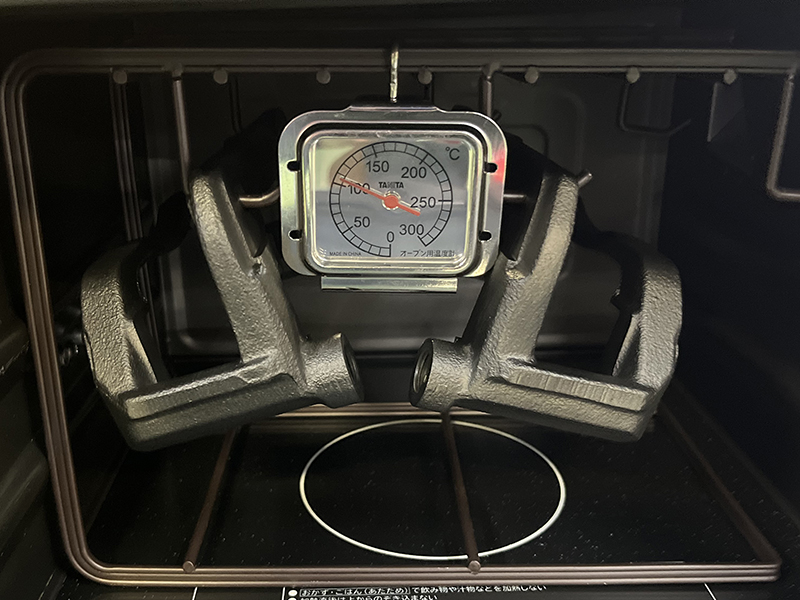
Oven-baking GUN-KOTE
- The main bake is complete.
After pre-baking at 100°C for 30 minutes, I carried out the main bake at 170°C for 90 minutes.
The photo shows the parts after they had been left for a while following the main bake.
Relying on the oven setting alone is worrying because it gives no indication of the actual temperature, but being able to check it with a thermometer provides some reassurance. The difference between the oven setting and the actual internal temperature measured by the thermometer was surprisingly small: the thermometer read almost exactly 170°C. - The brackets after the main bake.
The gloss had diminished from its freshly sprayed appearance, producing the finish I had intended. - I pre-baked and baked the caliper bodies using the same procedure.
It was difficult to hang both calipers at once, so I baked them one at a time.
The finish was just as intended, and it worked well on the first attempt.
I think the single-component formulation and the method of building up thin coats help make mistakes less likely.
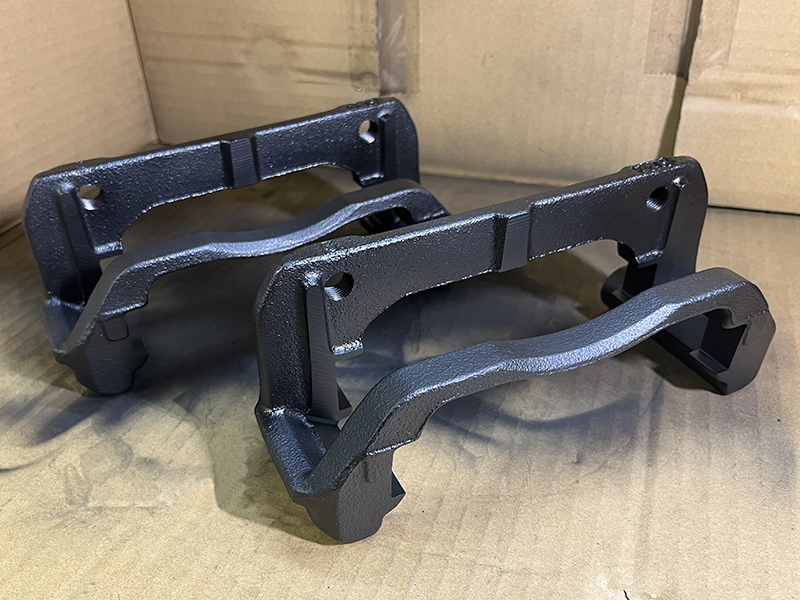
Bracket GUN-KOTE baking complete
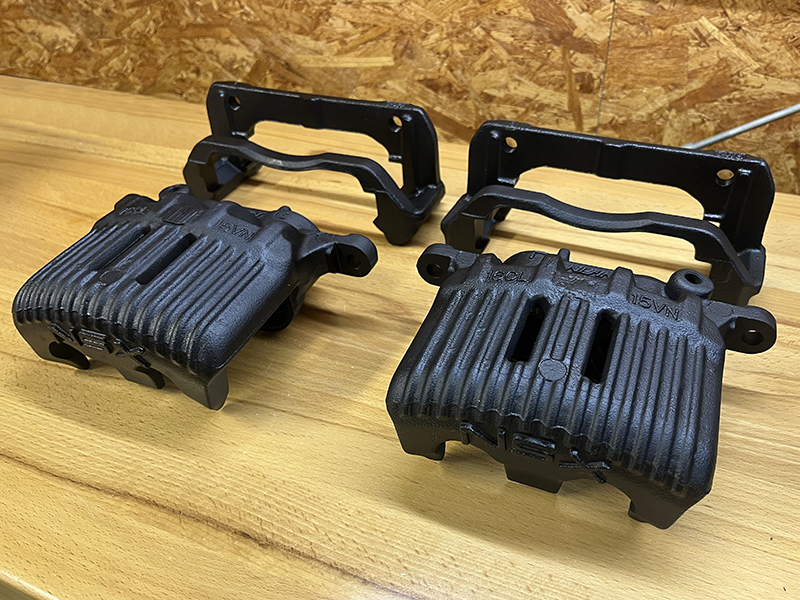
Bracket and caliper GUN-KOTE baking complete
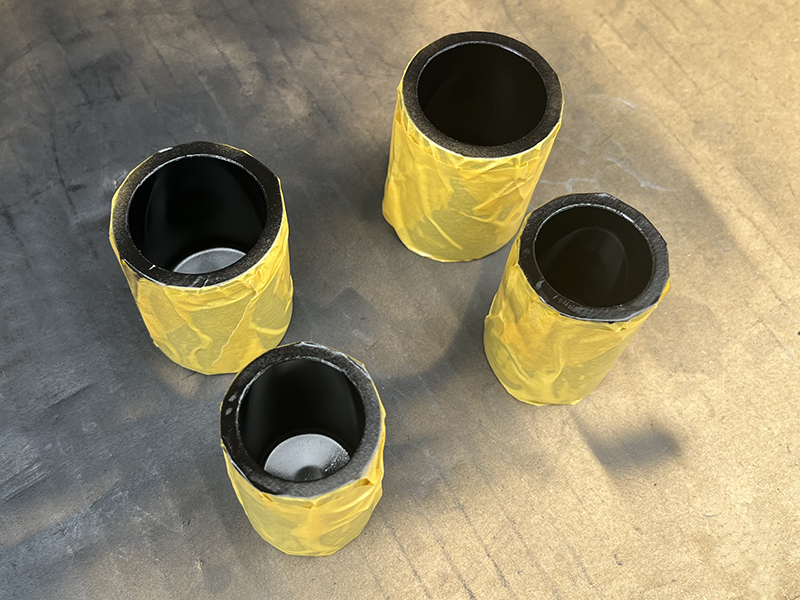
Applying GUN-KOTE inside the pistons
- Water often gets inside the pistons and causes rust, so I decided to mask only the insides and apply GUN-KOTE.
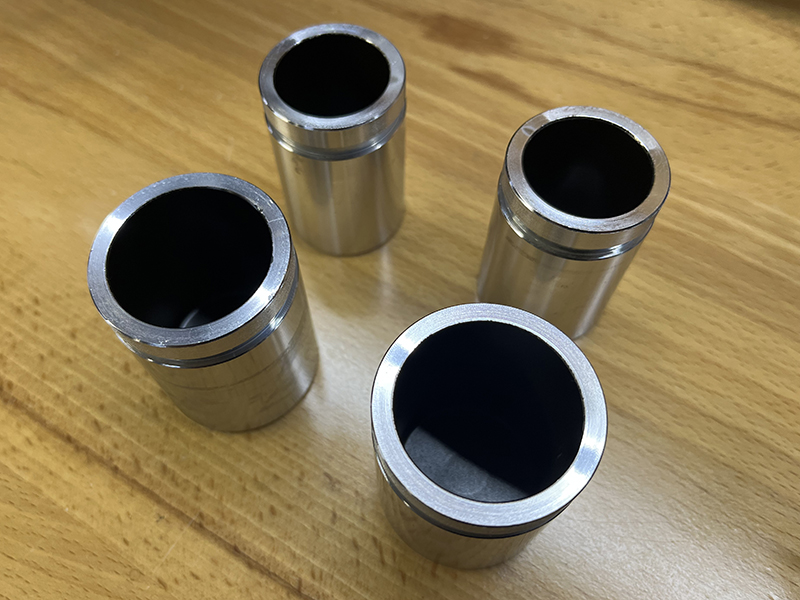
Piston interior GUN-KOTE baking complete
- The GUN-KOTE on the pistons has been baked. It is difficult to see in the photo because of the shadows, but the insides are thoroughly coated with GUN-KOTE.
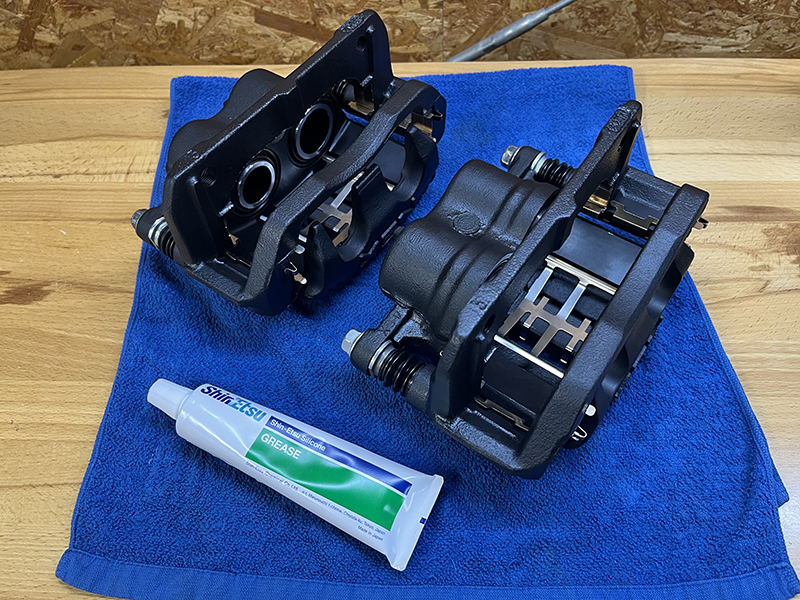
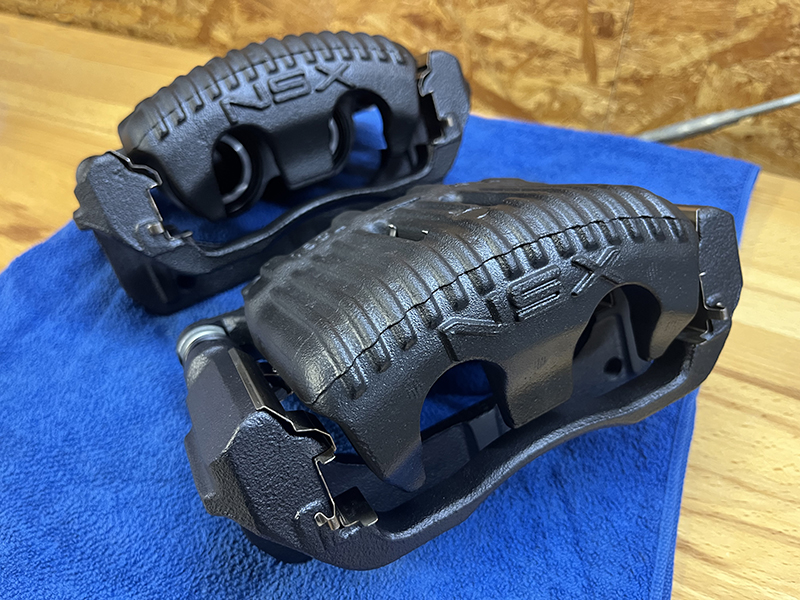
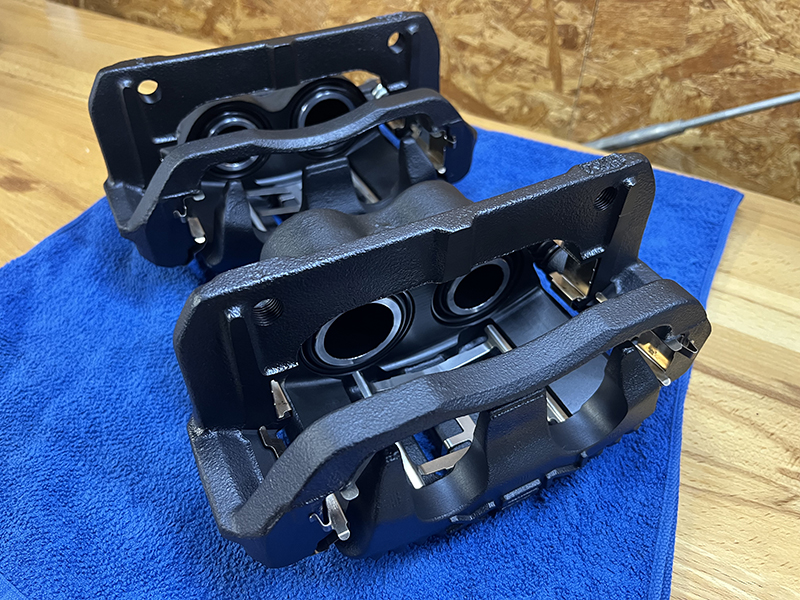
Caliper assembly complete
- Assembly and overhaul are complete using the GUN-KOTE-coated parts and the cleaned parts.
The assembly process is not particularly difficult and is covered in many other places, so I will omit the details. To insert the piston into the boot, first fit the boot into the cylinder, then spread it with your fingers while pushing the lower end of the piston in at an angle. This makes insertion easy. For the piston seals, I used the trusted Shin-Etsu Chemical G40. - The finished refurbishment.
The subdued sheen is very attractive, with a finish close to the factory black chromate.
The matte color makes the uneven surface of the cast calipers less noticeable, which may also contribute to the clean appearance. - The inner side after refurbishment.
In the photo, they look almost new.
Caliper assembly complete
Caliper assembly complete