
AEM: An American Standalone ECU
As part of my manual transmission conversion, I was considering converting the ECU to the manual transmission specification. I became interested in the standalone ECU from AEMopen_in_new and decided to try it after learning that Tomiyoshi Racing's NSX, which was attracting attention at the time, was using one.
- I bought it on eBay, and it arrived about two weeks later.
Inside the box were only the unit, an RS232C cable, an instruction manual, double-sided tape, and terminals that appeared to be for optional inputs and outputs.
The instruction manual was a brief seven-page document covering little more than the basics and connector pin assignments.
In practice, this meant relying on the general-purpose manual included with the download of the AEMPro PC software ( EMS 30-1042 Instruction Manualopen_in_new ) to learn how to use it.

AEM Unit and Accessories
Plug-in Installation
- The unit's connectors are fully compatible with the stock ECU, so the wiring installation simply involves unplugging the stock ECU and plugging its connectors into the AEM unit.
However, the AEM unit has no brackets that match the stock ECU's mounting holes, nor any dedicated mounting stays, so it cannot be secured directly to the body as supplied. Apparently, the large adhesive hook-and-loop pad included with the unit is intended to attach it to the bulkhead.
One detail I wish they would improve is that mounting it to suit the connector orientation leaves the AEM logo upside down.

AEM Installed in the Car
The unit initially contains no calibration data, so it needs to be connected to a PC to transfer a base calibration.
First, download AEMPro from AEM's website and install it on the PC. Then launch the software and open the NSX calibration file (30-1042).
- Select "File" → "Open..." → "Startup Calibrations", then open "1042.V1.19.cal" in the "Honda-Acura" folder.
For some reason, the calibration file cannot be opened while the software is displaying the gauges after startup. It seems you need to click one of the icons to switch to a tuning screen first.

Loading Calibration Data

Connecting the AEM Unit to the PC
- Connect the AEM unit to the PC with the RS232C cable and turn the ignition key to "ON" to power the unit. Then select "ECU" → "Connect" in AEMPro to establish the connection.
I had trouble with this connection process.
Attempts to connect through AEMPro produced framing or parity errors, preventing a connection. Unplugging and reconnecting the AEM connectors or the PC cable sometimes brought it online, but the connection remained unstable.
Similar symptoms were reported on overseas forums, but I could not find a clear solution.
Since I had been powering up the AEM with the PC cable already connected, and unplugging and reconnecting the connectors or cable sometimes allowed a connection, I suspected that data sent from the RS232C port during AEM startup might be interfering with communication.
I then tried this sequence: power up the AEM with the cable disconnected (ignition ON) → connect the cable → connect through AEMPro. This allowed me to connect without errors.

Basic Setup Before Starting the Engine

Initial Throttle Position Setup
- Once online, select "ECU" → "Send New Calibration..." to transfer the calibration data to the AEM unit.
- Set the throttle position range in AEMPro. Select "Configure" → "ECU Setup" → "Set Throttle Range..." and register the positions with the accelerator released and with it fully depressed. This completes the basic setup, and the engine can now be started.

Initial Setup After Starting the Engine
VTEC 「Setup」→「VTEC」→「Options- VTEC」
AEM allows you to set the engine speed at which VTEC switches to the high-lift cam profile. The default is 4500 rpm, lower than the stock setting.
I left it unchanged because it might suit the overall calibration.
Rev Limit 「Setup」→「Revlimiters」
AEM's default rev limit is 8500 rpm.
That made me nervous, so I lowered it to the stock value of 8000 rpm.
Display Units 「Configure」→「Units...」
I find the default display units difficult to read, so I change temperature from Fahrenheit to Celsius and speed from miles per hour to kilometers per hour.
Engine Startup
After switching to AEM, the engine needed to crank longer than it did with the stock ECU.
In terms of sound, the stock ECU was "crank-crank-crank-vroom", while AEM was "crank-crank-crank-crank-crank-vroom".
I checked settings that seemed relevant, but could not identify the cause or a way to improve it.
Also, when I lightly blipped the throttle from idle, the engine speed took a while to settle and the response was jerky.
The transition back to idle was not smooth, and I felt that drivability in everyday street use needed improvement with this initial calibration.
O2 Sensor Settings
O2 sensor feedback is OFF in AEM's default calibration.
The settings seem to assume a wideband O2 sensor, and turning feedback ON while retaining the stock narrowband sensors did not work properly.
Specifically, the air-fuel ratio (A/F) rose to 17 or higher, and forcing the sensor calibration to "A/F 14.7 = 0.45 V" caused an error.
Using an A/F meter installed later, I measured the air-fuel ratio at idle with feedback OFF. It fluctuated between 15.5 and 16.5. Although this was on the lean side, the engine could still maintain idle.
3D Map Display
The map tuning screen displays the map in 3D alongside a numerical table. Seeing the map in three dimensions really makes it feel like I am tuning the engine, which is exciting. You can also increase or decrease values by moving the grid points up and down in the 3D display.

AEMPro Tuning Screen
- An A/F meter is essential for ECU tuning.
After considering several manufacturers, I chose
INNOVATEopen_in_new
, which was widely used among DIY tuners at the time and had a reputation for accuracy.
I wanted Japanese-language data logging software and access to support in Japan, so I bought an officially distributed unit from GRIDopen_in_new . - I added an O2 sensor bung to the short pipe upstream of the front bank's catalytic converter (the adapter section used to convert the NA2 layout to the NA1 layout).
- I fitted the additional O2 sensor immediately downstream of the stock O2 sensor. I was concerned about heat because it was just ahead of the catalytic converter, but decided it would probably be acceptable since the stock O2 sensor was nearby as well.
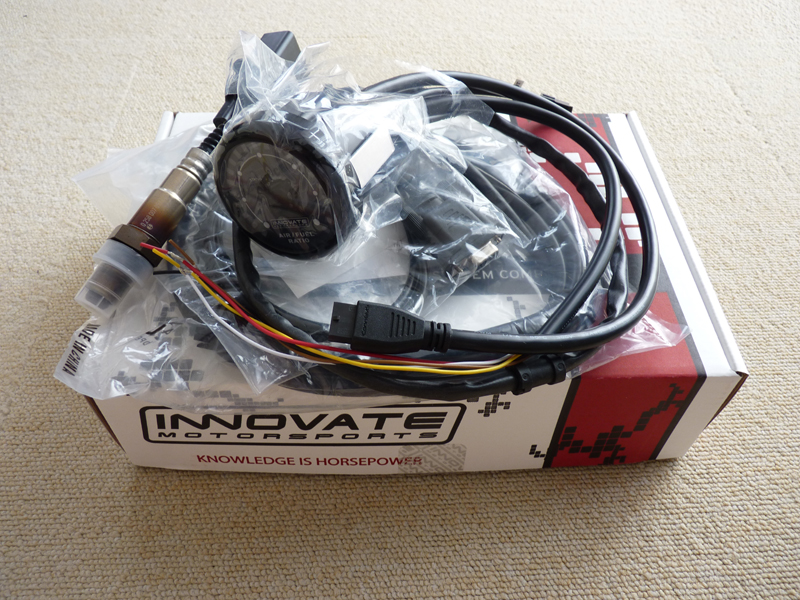
The INNOVATE Unit I Bought
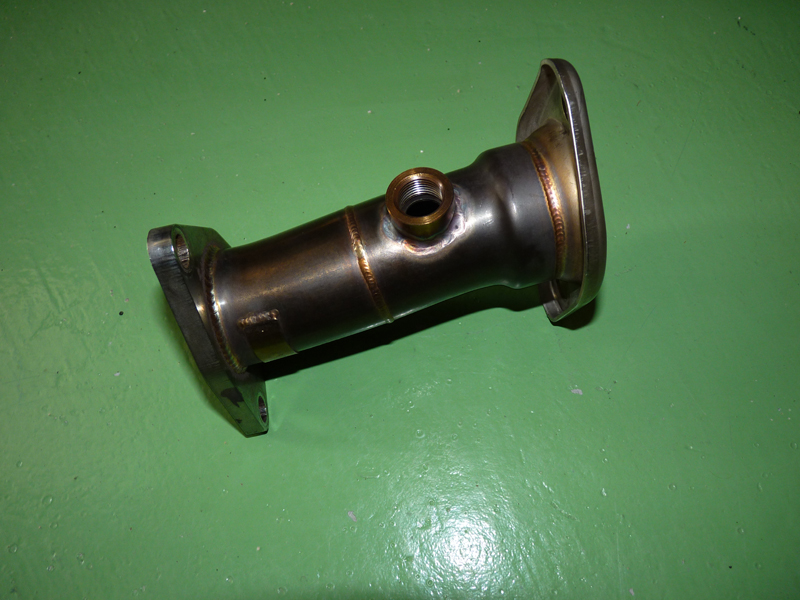
Adding an A/F Sensor Bung
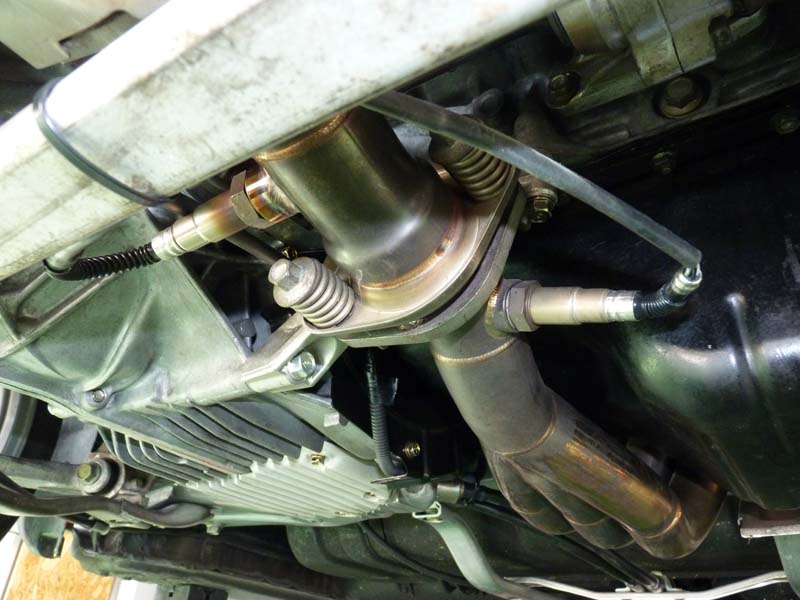
Installing the Pipe with the A/F Sensor
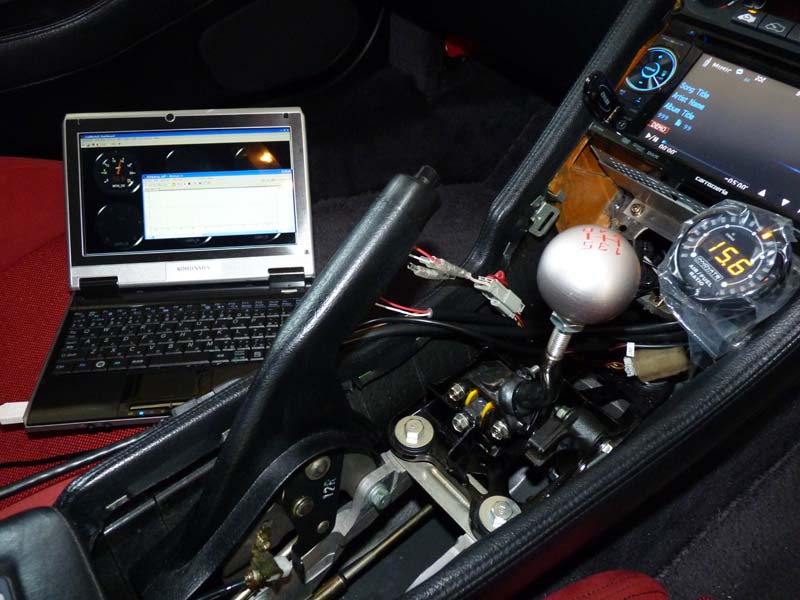
Testing the Data Logging Software
- I temporarily placed the display near the dashboard where I planned to install it.
In the NSX, the wiring route from the engine area to the dashboard is long. Even the longer supplied sensor cable (3 m) had almost no length to spare.
Next, I connected it through an RS232C-to-USB adapter to a PC with the supplied data logging software installed. I confirmed that the software displayed the data and that logs could be saved and reviewed later.
The display is still temporarily positioned, but I plan to modify the dashboard so it can be installed neatly.
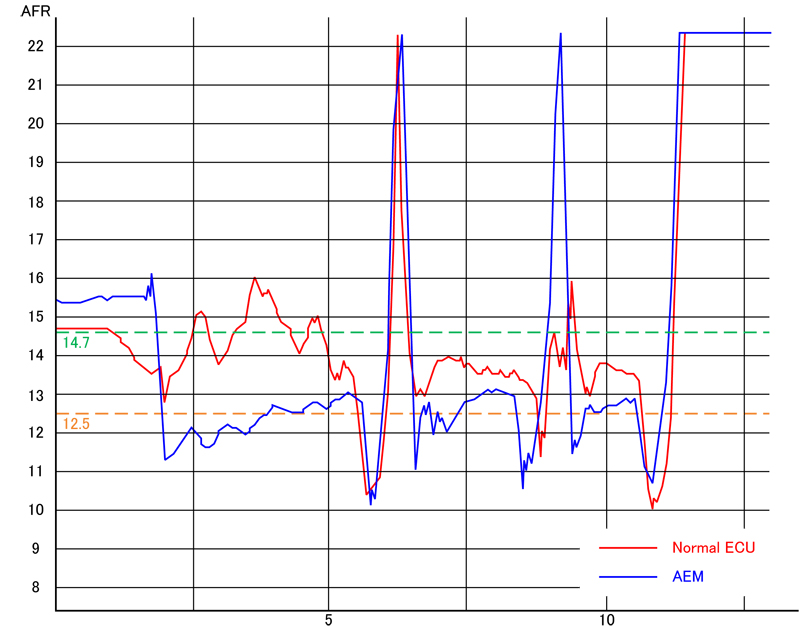
Stock ECU vs. AEM: A/F Measured with INNOVATE
I used the INNOVATE A/F meter to compare the air-fuel ratios of the stock ECU and AEM with its initial calibration.
I recorded data from first through third gear while accelerating at full throttle from a standstill on a straight, shifting up at approximately 6000 rpm.
In this log, the stock ECU's air-fuel ratio changed from around 14.0 to around 13.5 during acceleration. AEM, on the other hand, spent many sections around 12.5, showing a tendency to run richer than the stock ECU.
However, there were large fluctuations around gear changes, and the acceleration period was short. It therefore seems difficult to judge trends at individual engine speeds or the quality of the calibration from this log alone.
Subjectively, AEM felt more responsive and seemed to accelerate more strongly. In street driving, however, it felt sluggish at low engine speeds. These are only impressions from the conditions tested here. Further checks under different conditions seem necessary to establish their relationship to the air-fuel ratio and to evaluate the ECU as a whole.