-
Although the fixed lights of the NSX cannot automatically adjust the light axis, they are equipped with a leveler that has an electronic adjustment mechanism (the wiring hole of the connector is plugged).
Vehicles with fixed lights have a clearance designed to avoid this leveler, but for models with retractable headlights that do not have a clearance, measures are required to avoid interference.
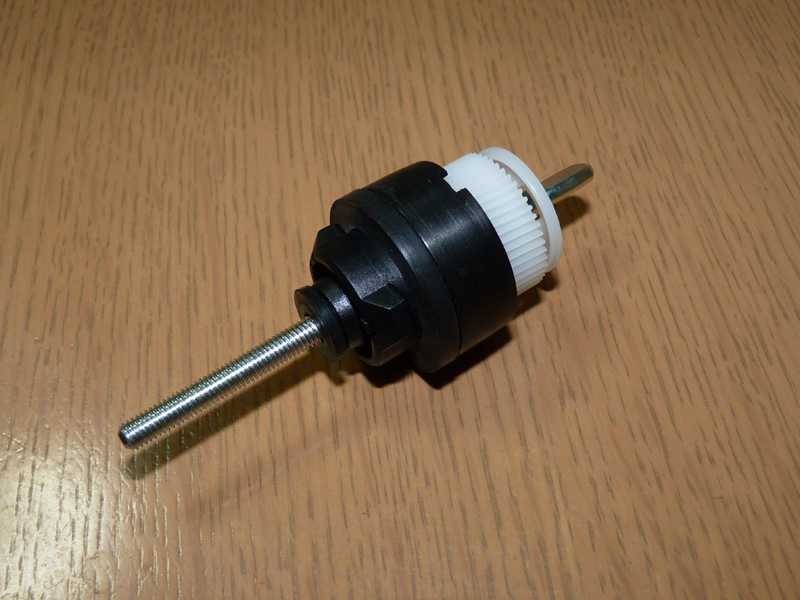
At the time, Rute KS was selling a replacement leveler with a simple structure that did not have a motor part, but we decided to modify the genuine leveler to reduce costs. - This is the leveler with the case opened. It appears that the rotation of the gear rotated by the motor is detected by a proximity sensor in 120° increments to accurately adjust the level.
- The leveler has been disassembled. The nut part at the rear end used for level adjustment is integrated with the case that houses the motor, etc., so it seems difficult to reuse it partially.
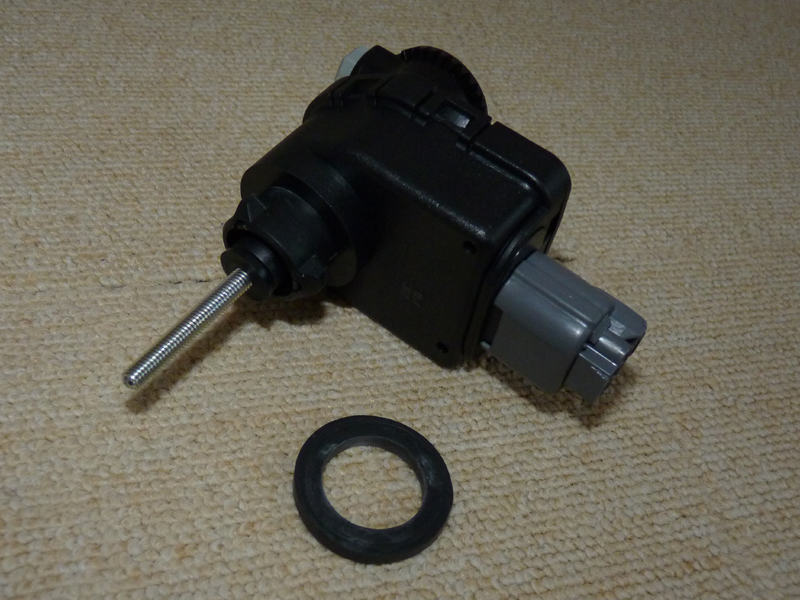
NSX late-model fixed headlight OEM leveler
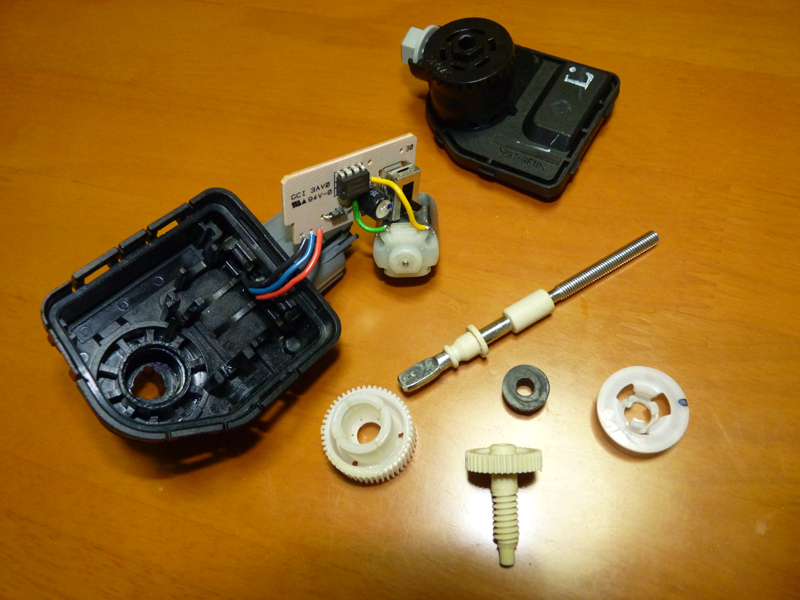
Disassembled leveler
OEM leveller disassembled
- After cutting off the unnecessary parts of the headlight case to get a rough shape, I attached bolts and nuts so that it could be attached to the chuck of the drill press. While rotating the drill press, I used a file to file it down into a perfect circle.
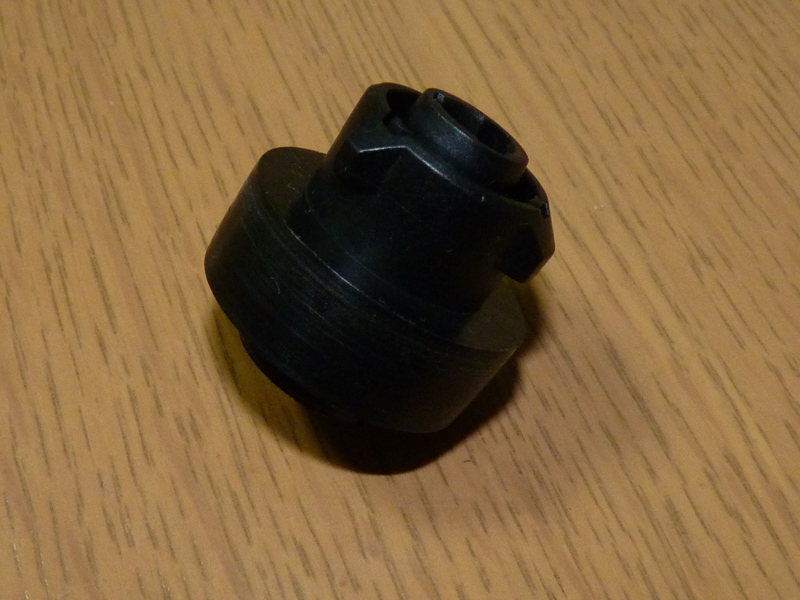
- After completing the shaping process with the drill press. I think the processing was pretty neat considering it was done by hand with a drill press.
-
Reassemble the leveler using the modified case.
Since the mechanism fixed to the rear case cannot be fixed,
it is necessary to grasp the flat part of the head of the adjustment bolt and rotate it.
It does not look good, so I would like to make something like an adapter to connect it.
But for now, I will complete it in this state.
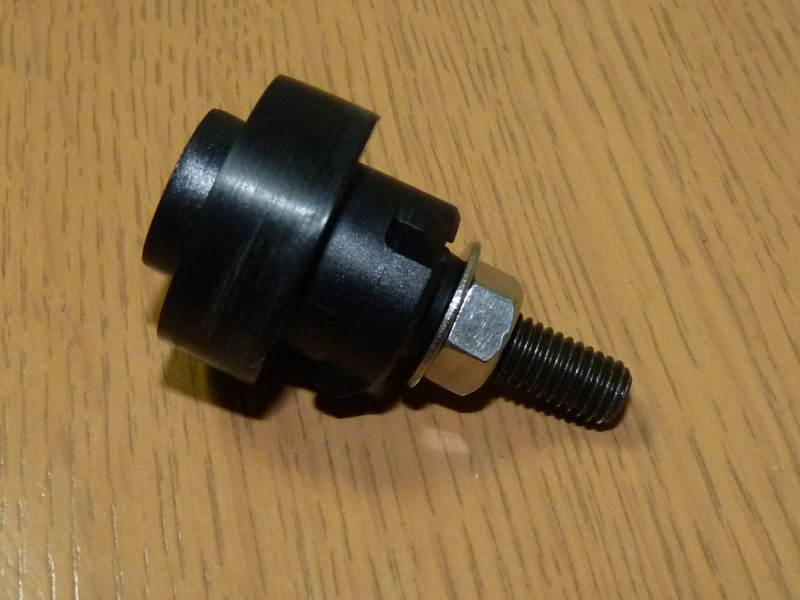
Preparing Leveller for Drill Press Machining
After levelizer processing is completed
After reassembly of the levelizer
- With the retractable light in the raised position, remove the four small oval covers attached to the cover covering the sides.
- Remove the oval cover to expose the four screws, then remove the cover body.
- After disconnecting the wiring connector, remove the four fixing bolts and remove the retractable light unit. Since two of the four fixing bolts need to be accessed from underneath, it is necessary to remove the inner fender.
- The retractable light-related parts and front bumper have been removed. The front bumper beam stays have also been replaced with those for the later model. The main role of the front bumper beam stays is to secure the bumper beam body, but the upper bracket also supports the bumper itself, and the height differs between early and later models. Therefore, when replacing fixed lights, they must be replaced with those for the later model, but this part has increased in price significantly in recent years.
Retractable Light Parts Removal Complete
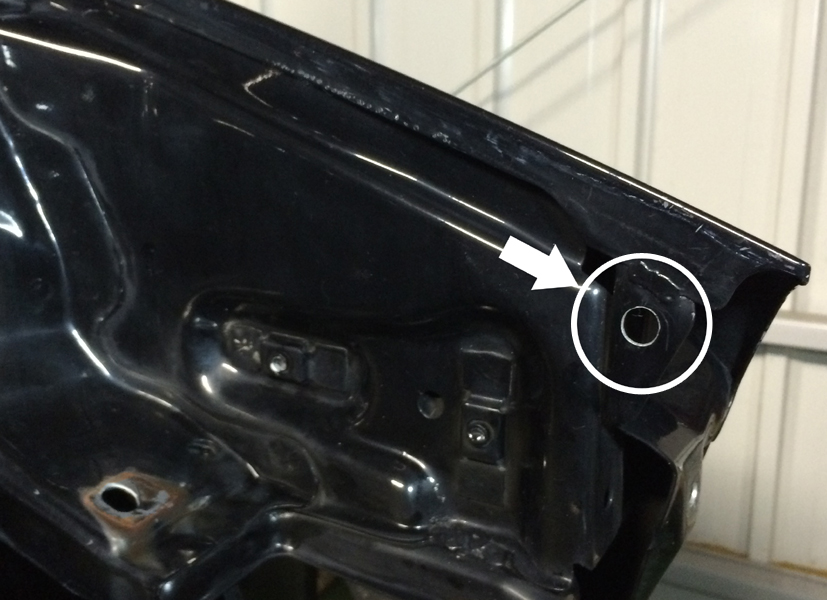
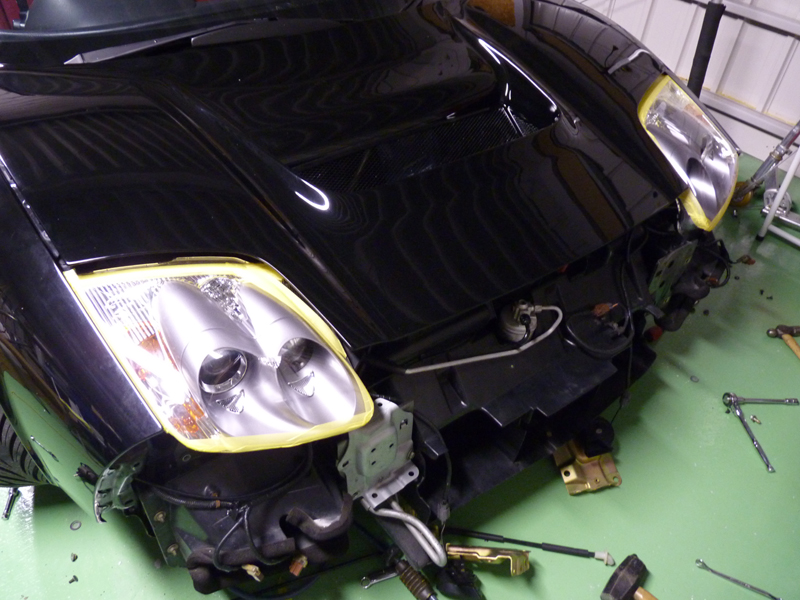
- The fixed lights have a protrusion on the fender for positioning, so it is necessary to drill holes in the left and right fenders to fit the protrusion. I carefully positioned the headlight while drilling the holes.
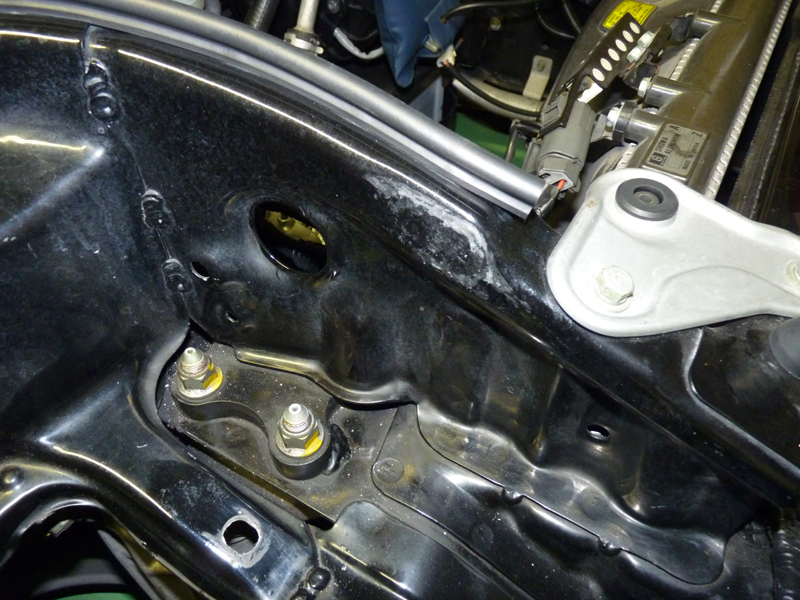
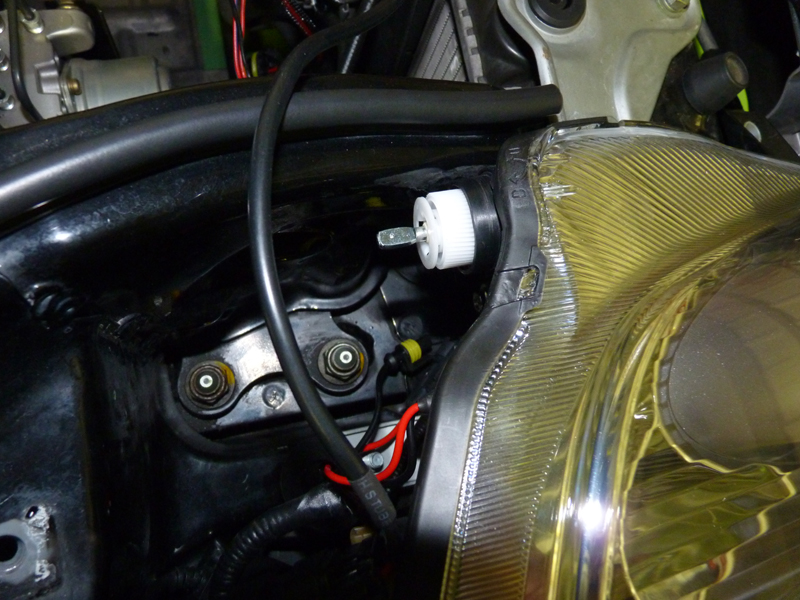
- Driver's side headlight fixing part. When I temporarily attached the headlight, the levelizer part interfered with the body a little, so I tapped the body a little to make a dent. By denting it by about 5mm, the levelizer part no longer interfered.
-
The passenger side was also hammered in to create a clearance.
In fact, when I adjusted the gap with the bonnet after this, I ended up raising the inside of the headlight more than when I temporarily fixed it, and in the end I was able to secure more clearance with the body than I expected. Perhaps I could have just about installed it without interfering with the body without having to dent it.
Hole for headlight protrusion to fit
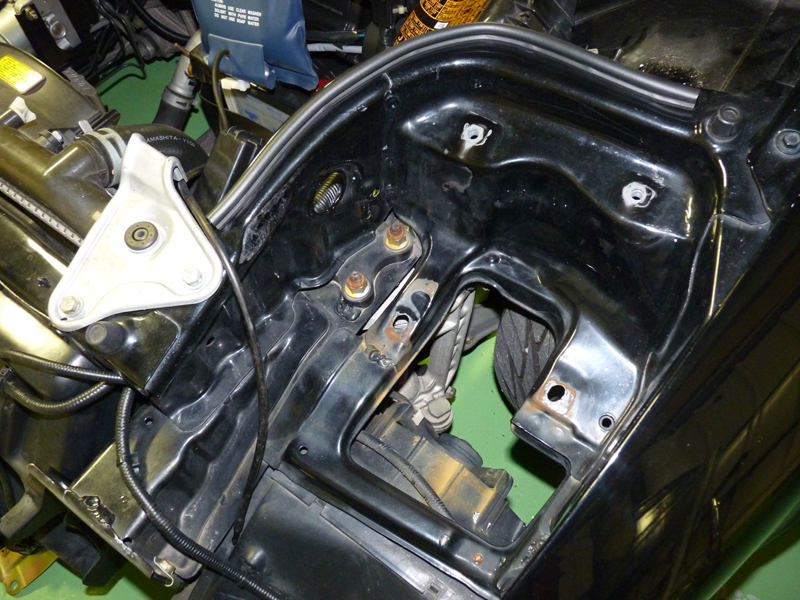
Body Panel Recessed for Leveller Clearance
Passenger side also recessed for clearance
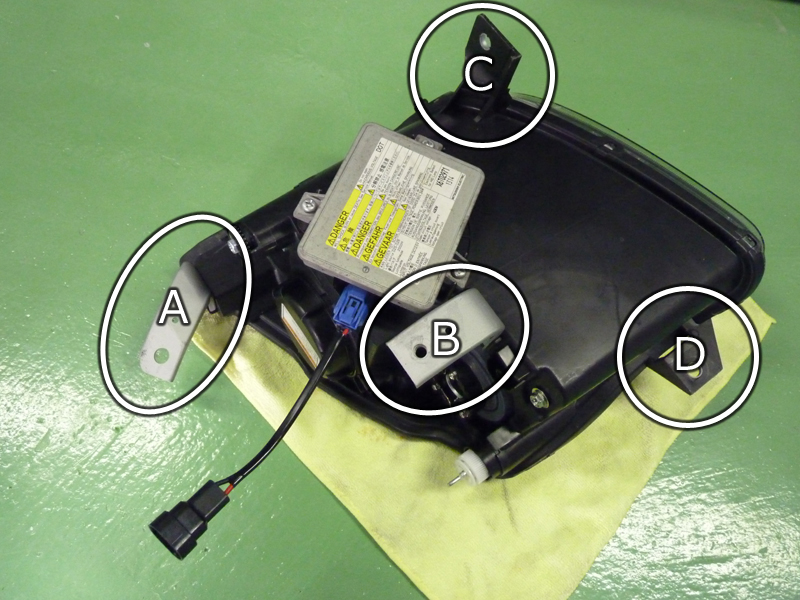
- The headlight seen from the back. The headlight is fixed to the body at four points on each side (brackets A to D). The silver brackets A and B are genuine parts, and the holes on the body where the retractable light was fixed can be used as is. Brackets C and D on the light body do not have any fixing points on vehicles with retractable lights, so brackets must be added.
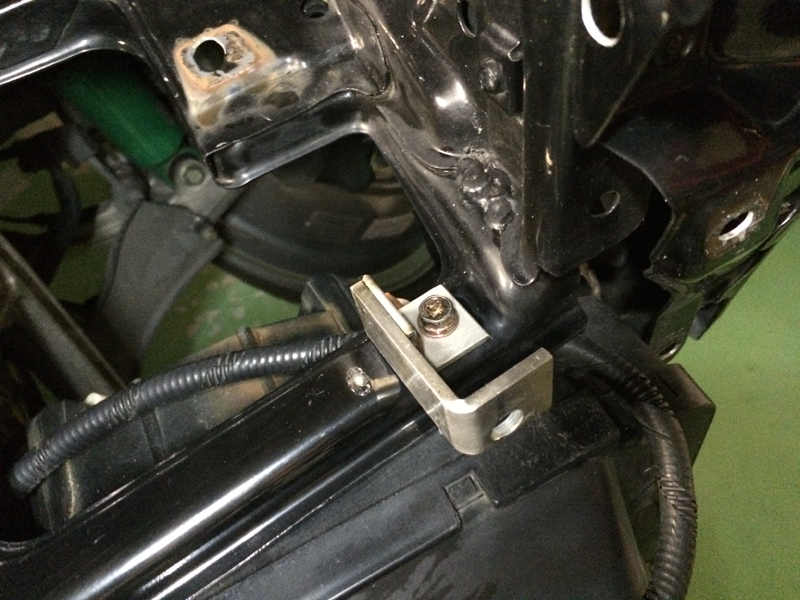
- The state where the aftermarket bracket for fixing part C to the body is attached. I happened to see it on Yahoo! Auctions, so I bought just this bracket and installed it. Since it uses the service hole that is already open in the OEM, no body processing is required. Part D did not wobble at all even without fixing it, so I did not fix it.
- The C bracket and aftermarket bracket combined (driver's side). This bracket has a somewhat quirky shape because the bracket on the headlight side is slightly lower than the body surface where the service hole is located.
Headlight rear mounting bracket
An external bracket for fixing the C bracket
Headlights attached to aftermarket brackets
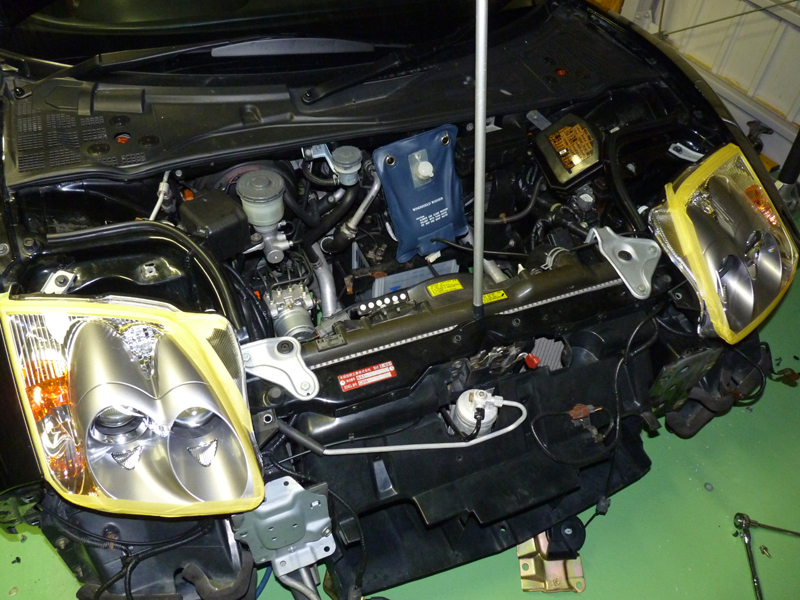
Fixed light installation complete
- Left and right headlight installation complete.
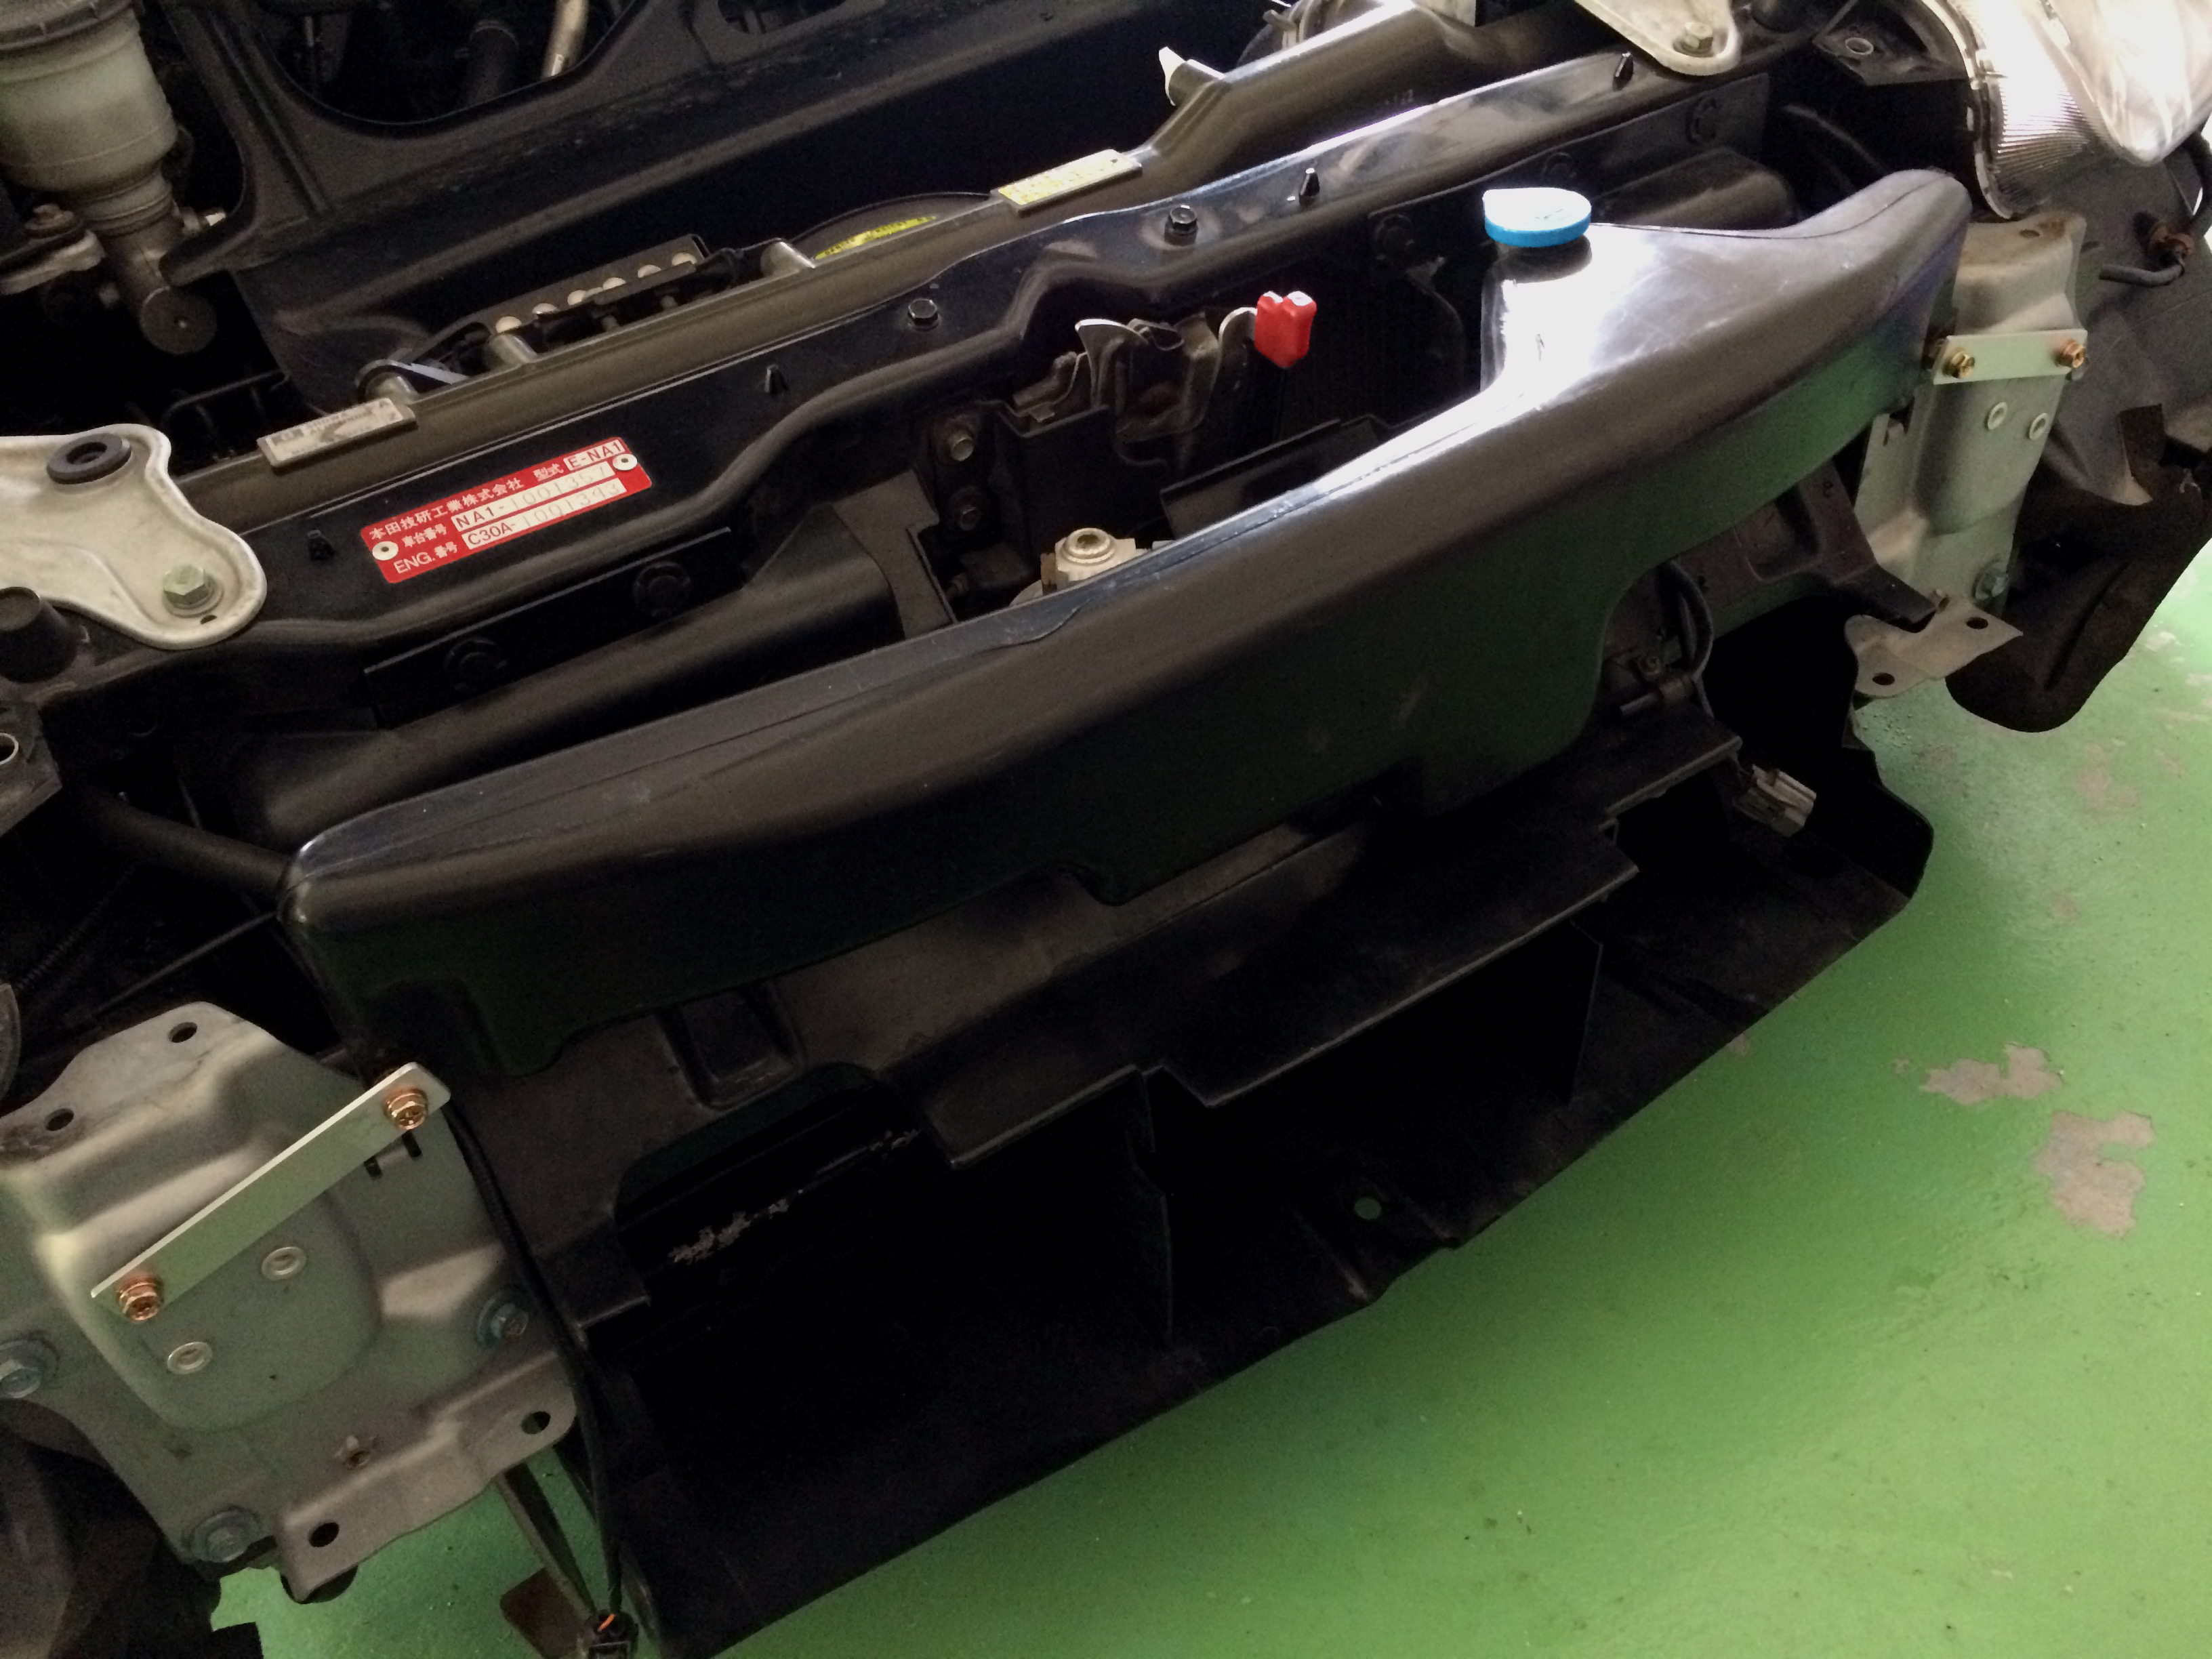
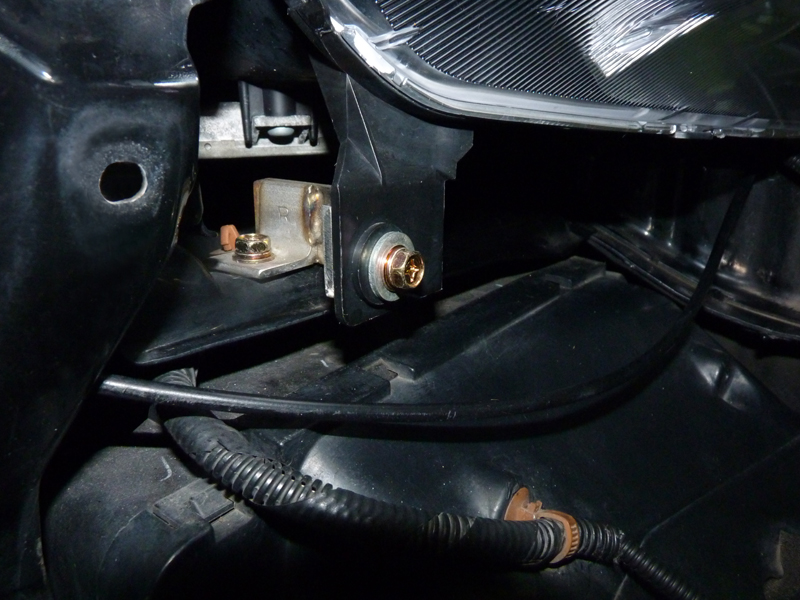
Clearance with leveller
- There is no problem with the clearance between the leveller and the body.
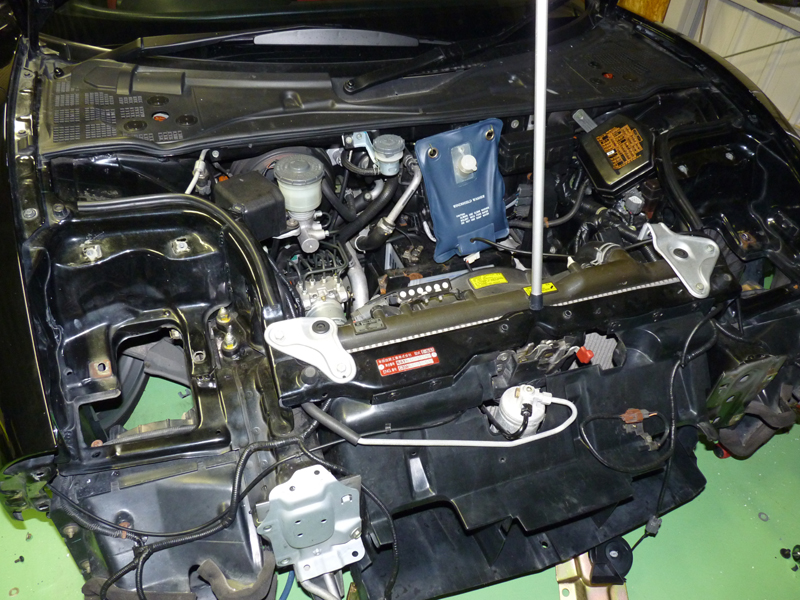
Washer Tank Mounted to Bumper Beam Stay
- The washer tank is attached to the bumper beam, but since my vehicle had this removed to reduce weight, I decided to attach it by extending a bracket from the bumper beam stay.

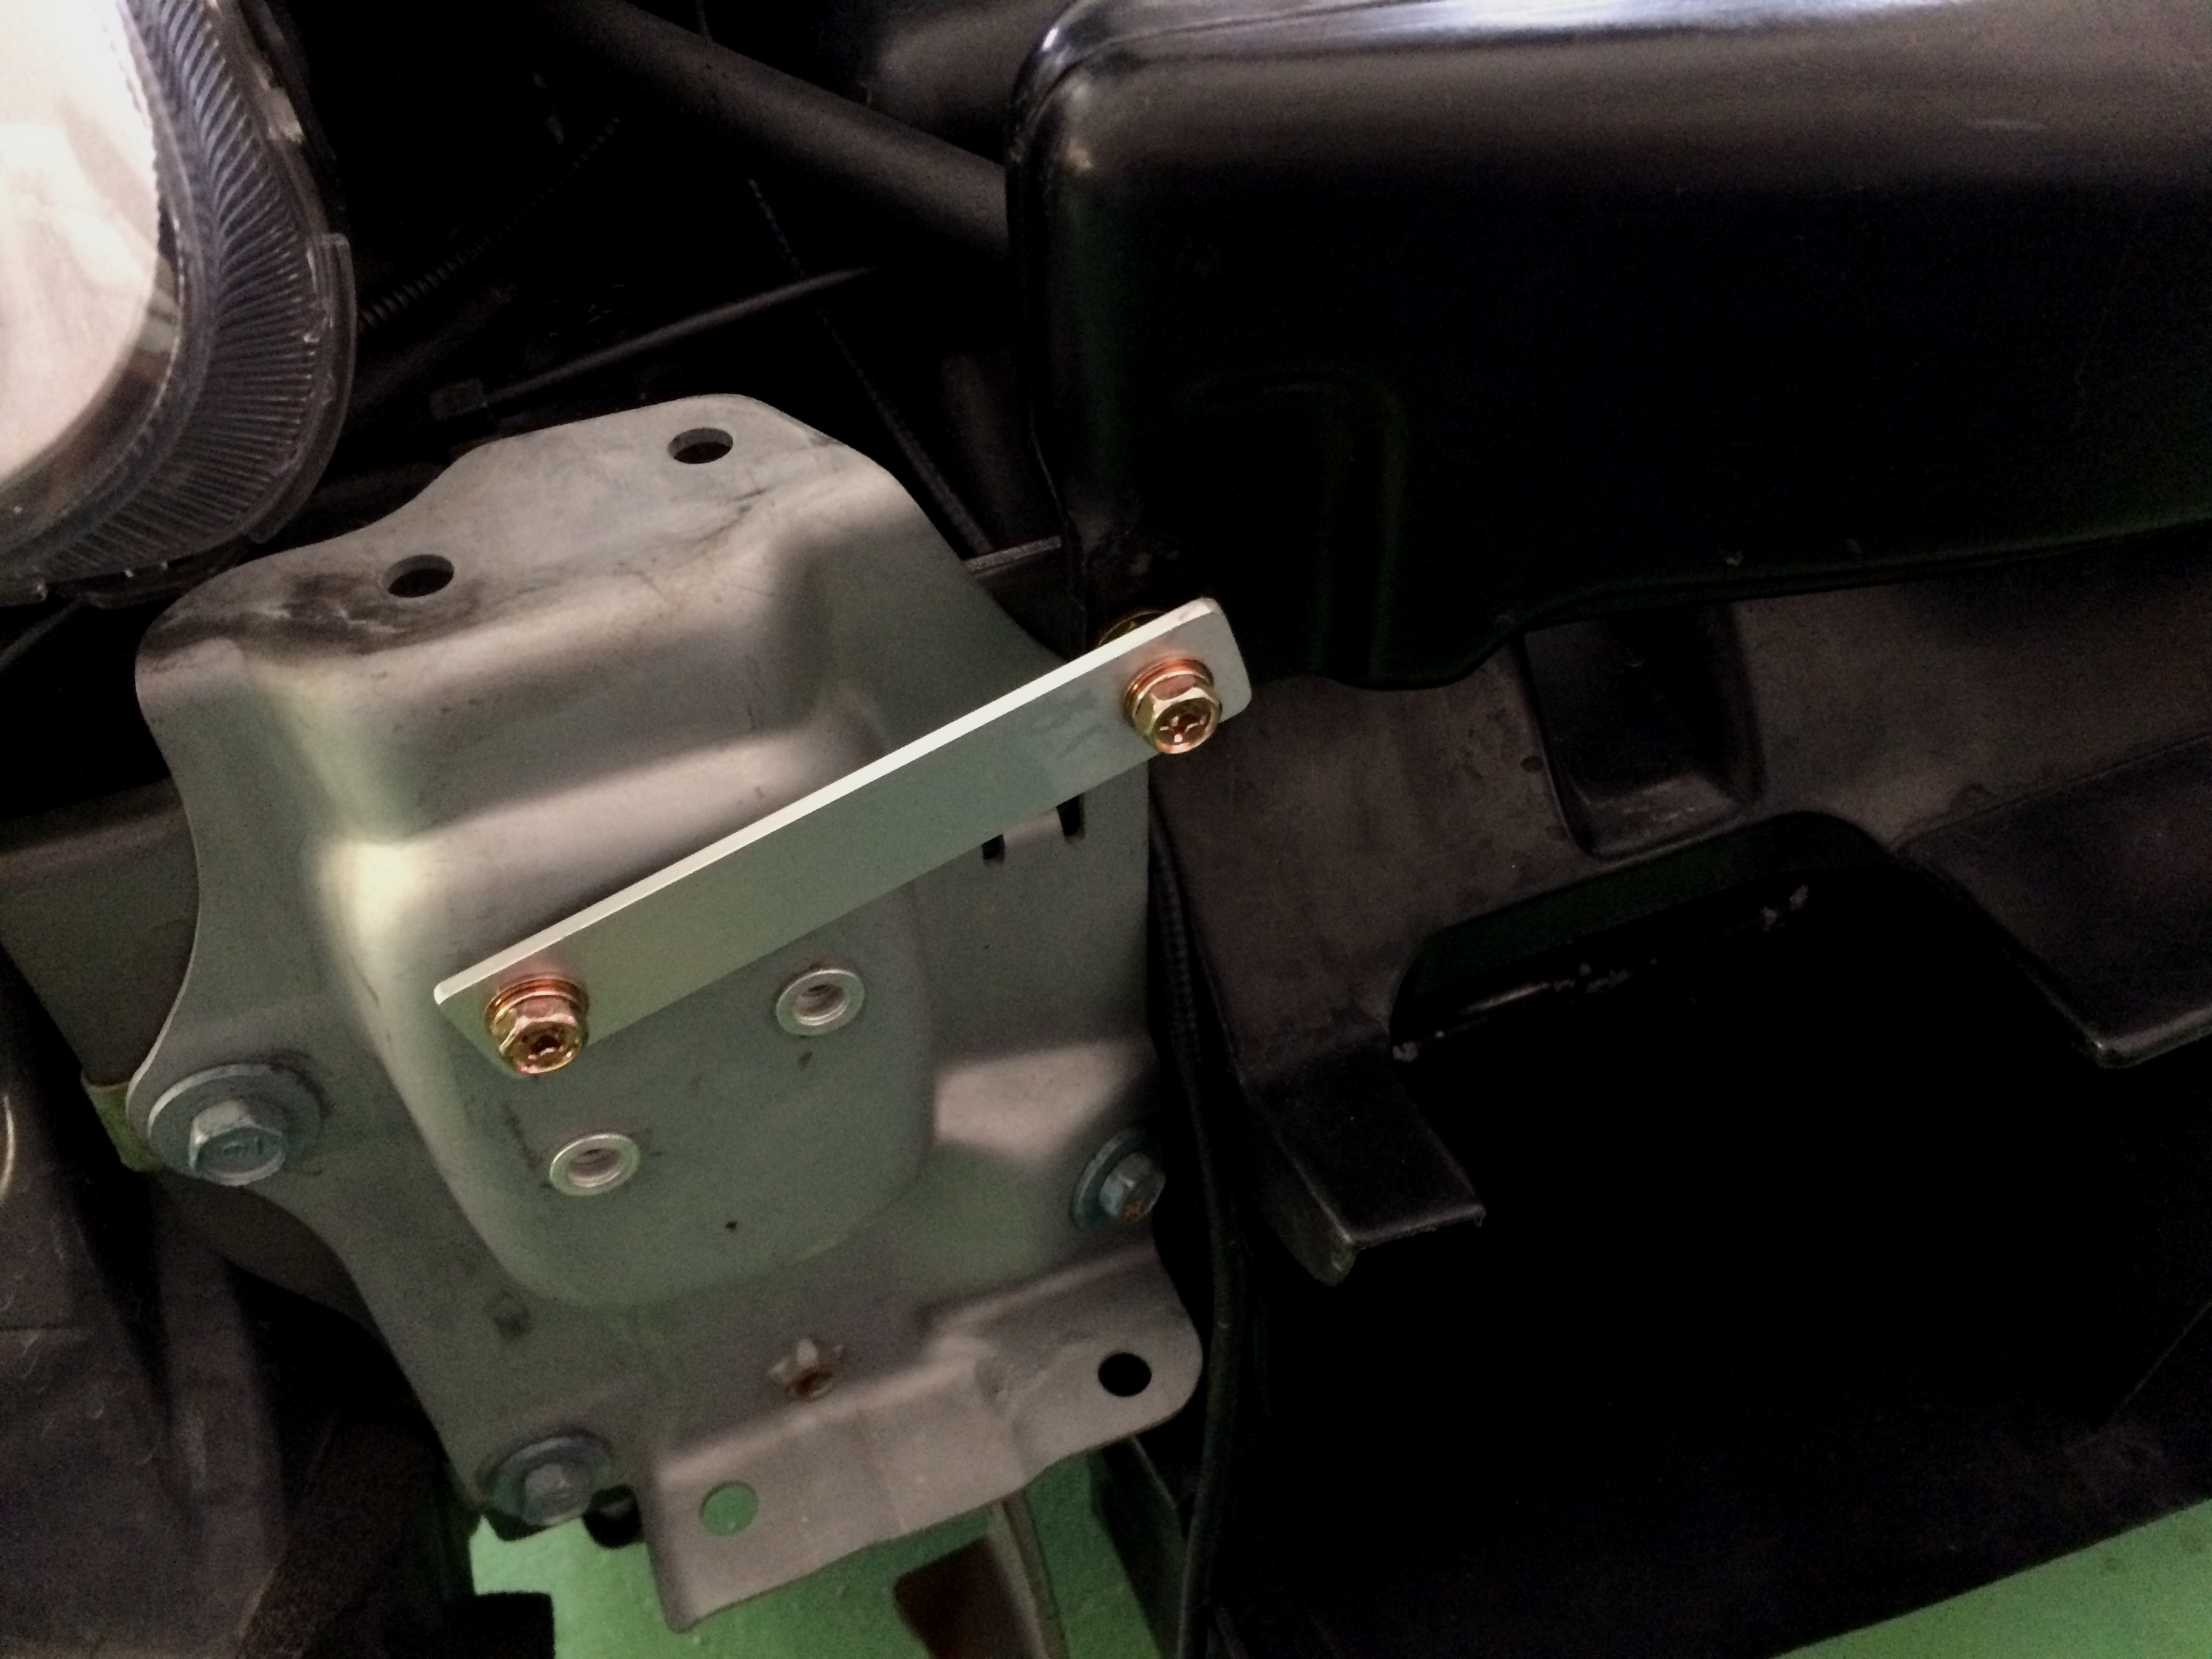
Attach Stay to Bumper Beam Mounting Hole
- An M6 nut rivet was installed in the hole in the bumper beam stay (originally a hole for attaching the bumper beam), and an aluminum stay was extended from there to secure the washer tank.
-
The state after the bonnet was installed.
It only needs to be fixed to the hinge with two bolts on each side, but it is safer to have two people hold both sides when installing.
The bonnet used here seems to be a TAITEC copy, featuring a duct that is larger and more aggressive than the genuine 02R version.
However, the fit was very poor, and no matter what I did I couldn't get the gap to match, so in the end I replaced it with a dry carbon bonnet made by RuteKS.It may not be obvious from the photo, but the boundary with the fender rises towards the front, and near the headlights it rises by nearly 10mm.
The 02R genuine dry carbon bonnet is no longer in production, but even in 2010 when it was still available, it was extremely expensive at 1,080,000 yen, so I didn’t even consider buying the genuine part back then. I saw it on Yahoo! Auctions several times, but I regret not buying it then.
After Installing FRP Bonnet (Unknown Maker)
| Part Number | Part Name | Unit price |
|---|---|---|
| 60100-SL0-Z10ZZ | Food COMP. | 1,080,000 |
| 60116-SL0-Z10 | Mesh, Food | 72,500 |
| 74146-SL0-Z10 | Seal rubber, hood mesh | 1,440 |
After Installing Genuine Late-Model Bumper
- After installing the bumper. The bonnet was changed to a dry carbon bonnet made by RuteKS, and the fit has improved considerably.
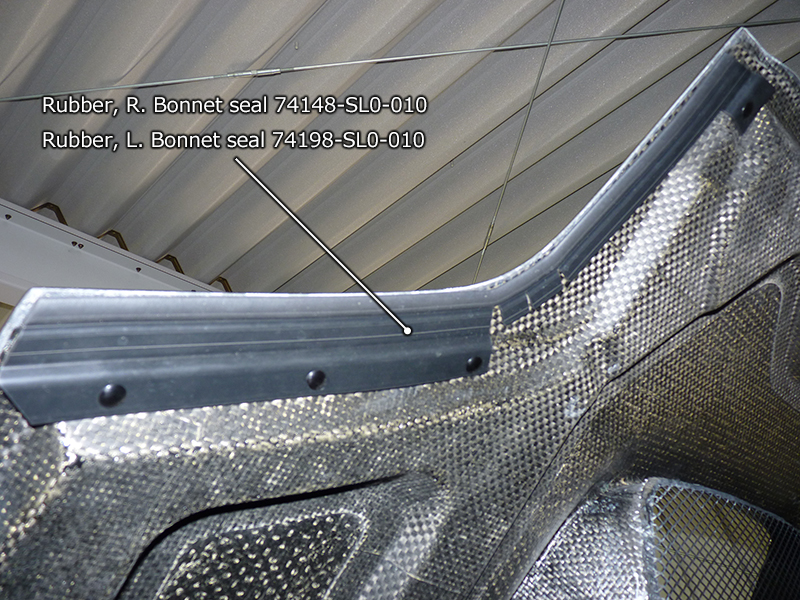
- Attach the genuine seal rubber to the back of the hood. Use clips and double-sided tape to attach it. I would like to replace at least the grill attached to the back of the duct with the genuine part, but this hood has a grill that is glued to the duct, and there is no bracket to attach the genuine grill (60116-SL0-Z10: mesh, hood), so I gave up.
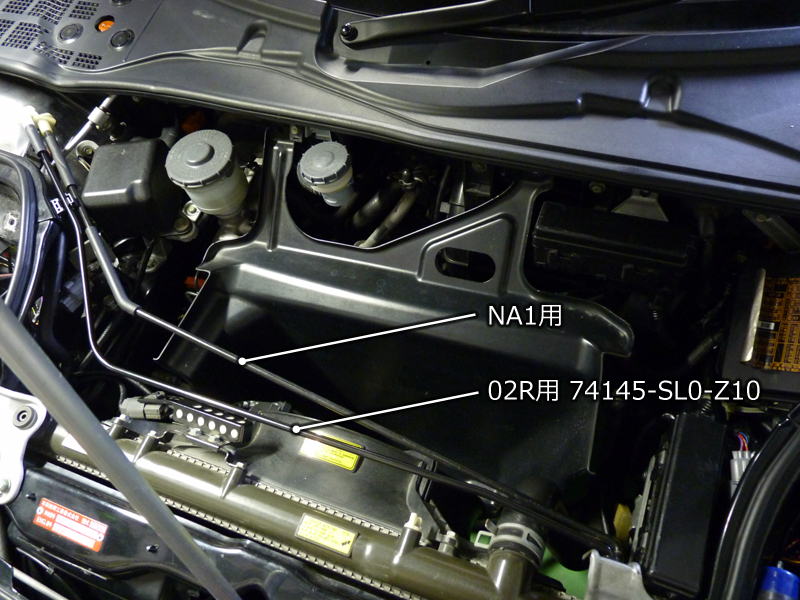
- Comparing the bonnet opener stays. The shape of the NSX-R version has been changed to avoid the duct. The radiator duct is a genuine part, but the shape is different because the upper part was cut to fit the duct of the bonnet of an unknown manufacturer.
After installing the bonnet seal rubber

Comparing bonnet brackets (standard vs 02R)
Short parts for bonnet installation
Price at the time of purchase (February 2014)
| No | Part Number | Part Name | Unit price | Quantity | Price | Remarks |
|---|---|---|---|---|---|---|
| 74145-SL0-Z10 | Stay, bonnet opener | 2,020 | 1 | |||
| 74148-SL0-010 | Rubber, R. Bonnet seal | 2,940 | 1 | |||
| 74198-SL0-010 | Rubber, L. Bonnet seal | 2,940 | 1 | |||
| 91505-SL0-003 | Clip, cowl top | 115 | 8 | |||
| Total amount | ||||||
All listed prices do not include tax.
Loading...
| No | Part Number | Part Name | Unit price | Quantity | Price | Remarks |
|---|---|---|---|---|---|---|
| 74145-SL0-Z10 | Stay, bonnet opener | 1 | ||||
| 74148-SL0-010 | Rubber, R. Bonnet seal | 1 | ||||
| 74198-SL0-010 | Rubber, L. Bonnet seal | 1 | ||||
| 91505-SL0-003 | Clip, cowl top | 8 | ||||
| Total amount | ||||||
All prices shown include tax.
*Parts with a blank unit price are either out of production or unavailable for order at the time of the survey.
*Even if a part has a unit price displayed, it may no longer be in production.
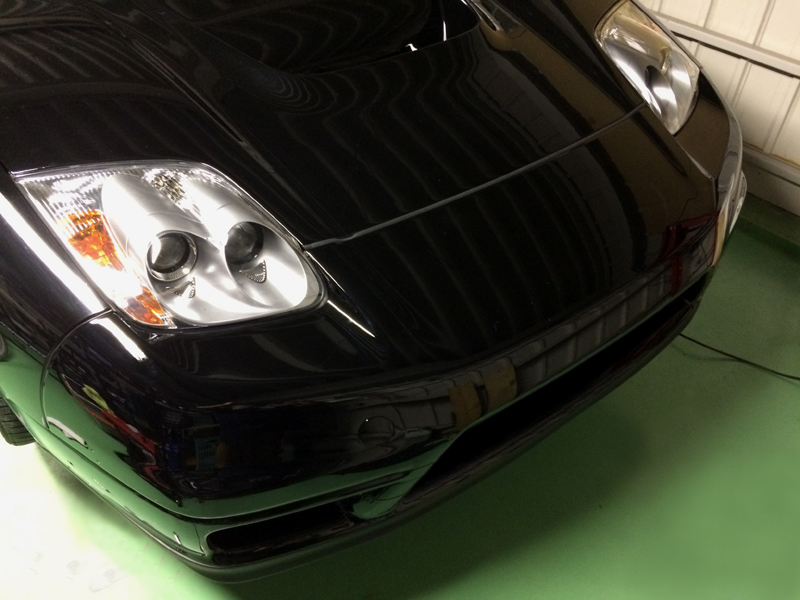
Replacement completed
- The condition of the front end after the conversion. The OEM bumper fits perfectly, and the quality of the dry carbon bonnet is also good. There is no surface distortion, which is often seen with FRP bonnets, so it doesn't feel out of place even if it's all OEM parts.
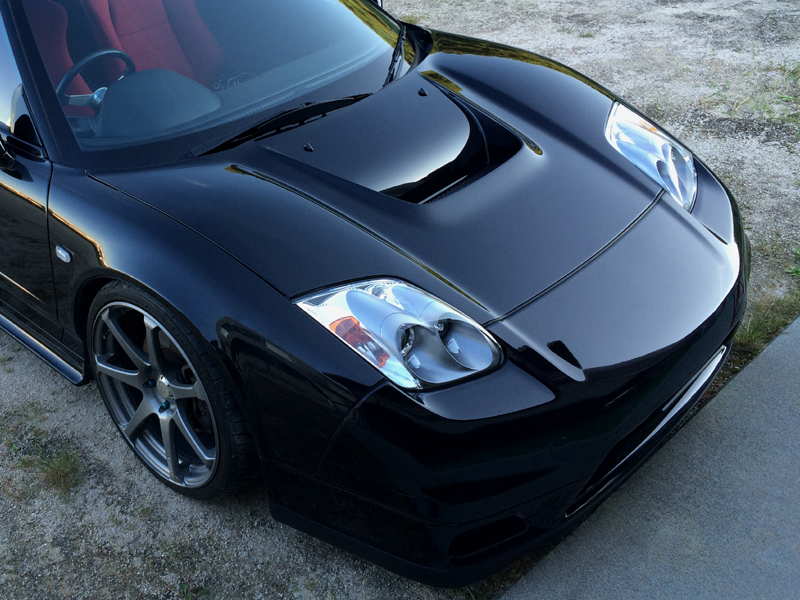
Completion
-
Even if you apply a primer and smooth the surface of dry carbon, the uneven carbon pattern will appear on the surface after the main coat dries.
While some sources claim the surface carbon pattern is intentional, it seems to me it simply appeared as a byproduct of the process.