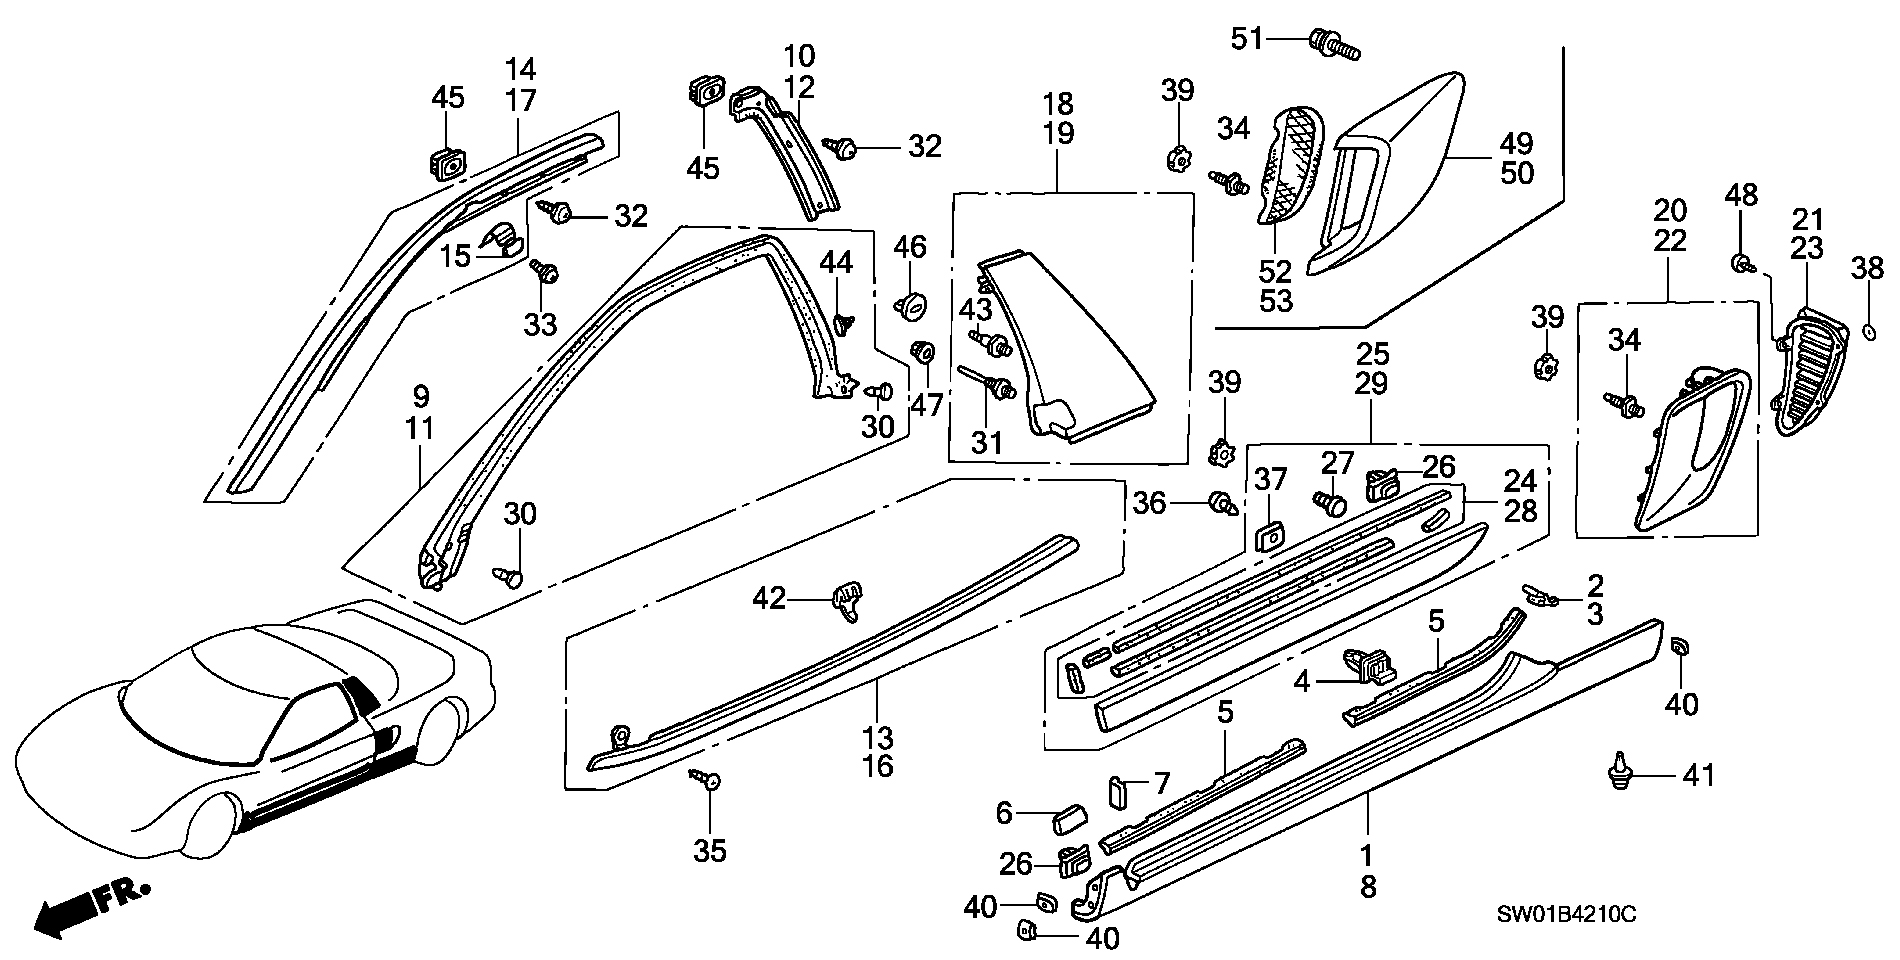
Side sill garnish, door lower garnish related parts
Price at purchase (November 2015)
| No | Part Number | Part Name | Unit price | Quantity | Price | Remarks |
|---|---|---|---|---|---|---|
| 1 | 71801-SL0-010ZZ | Garnish, R. Side sill | 62,700 | 1 | Integrated into 71801-SL0-305ZZ | |
| 2 | 71805-SL0-000 | Seal, R. side sill garnish cap | 700 | 1 | ||
| 3 | 71806-SL0-000 | Seal, L. side sill garnish cap | 700 | 1 | ||
| 4 | 71807-SL0-000 | Clip, side sill garnish cap | 350 | 18 | ||
| 5 | 71809-SL0-000 | Seal, side sill garnish | 1,410 | 4 | ||
| 6 | 71811-SL0-000 | Separator, side sill garnish | 1,960 | 2 | ||
| 7 | 71814-SL0-000 | Lip, side sill garnish | 680 | 2 | ||
| 8 | 71851-SL0-010ZZ | Garnish, L. side sill | 62,700 | 1 | Integrated into 71851-SL0-305ZZ | |
| 25 | 75312-SL0-000ZZ | Garnish assembly, right door lower | 28,800 | 1 | Integrated into 75312-SL0-305ZZ | |
| 26 | 75313-SL0-003 | Clip, Door Lower Garnish | 185 | 16 | ||
| 29 | 75332-SL0-000ZZ | Garnish assembly, L. door lower | 28,800 | 1 | Integrated into 75332-SL0-305ZZ | |
| 36 | 90142-SL0-900 | Screw, tapping 4X10 (PO) | 90 | 4 | ||
| 39 | 90329-SL0-000 | Nut, air inlet 6MM | 145 | 4 | ||
| 40 | 90331-SD5-003 | Nut, spring 5mm | 130 | 10 | ||
| 41 | 90505-SM4-003 | Clips, garnishes | 135 | 4 | Merged into 90505-SX0-003 | |
| Total amount | ||||||
All listed prices do not include tax.
Loading...
| No | Part Number | Part Name | Unit price | Quantity | Price | Remarks |
|---|---|---|---|---|---|---|
| 1 | 71801-SL0-305ZZ | Garnish, R. Side sill | 1 | Old product number: 71801-SL0-010ZZ | ||
| 2 | 71805-SL0-000 | Seal, R. side sill garnish cap | 1 | |||
| 3 | 71806-SL0-000 | Seal, L. side sill garnish cap | 1 | |||
| 4 | 71807-SL0-000 | Clip, side sill garnish cap | 18 | |||
| 5 | 71809-SL0-000 | Seal, side sill garnish | 4 | |||
| 6 | 71811-SL0-000 | Separator, side sill garnish | 2 | |||
| 7 | 71814-SL0-000 | Lip, side sill garnish | 2 | |||
| 8 | 71851-SL0-305ZZ | Garnish, L. side sill | 1 | Old product number: 71851-SL0-010ZZ | ||
| 25 | 75312-SL0-305ZZ | Garnish assembly, right door lower | 1 | Old part number: 75312-SL0-000ZZ | ||
| 26 | 75313-SL0-003 | Clip, Door Lower Garnish | 16 | |||
| 29 | 75332-SL0-305ZZ | Garnish assembly, L. door lower | 1 | Old part number: 75332-SL0-000ZZ | ||
| 36 | 90142-SL0-900 | Screw, tapping 4X10 (PO) | 4 | |||
| 39 | 90329-SL0-000 | Nut, air inlet 6MM | 4 | |||
| 40 | 90331-SD5-003 | Nut, spring 5mm | 10 | |||
| 41 | 90505-SX0-003 | Clips, garnishes | 4 | Old part number: 90505-SM4-003 | ||
| Total amount | ||||||
All listed prices include tax.
※ Parts with no listed unit price were either discontinued or unavailable for order at the time of this survey.
※ Even parts with a listed unit price may have already been discontinued.
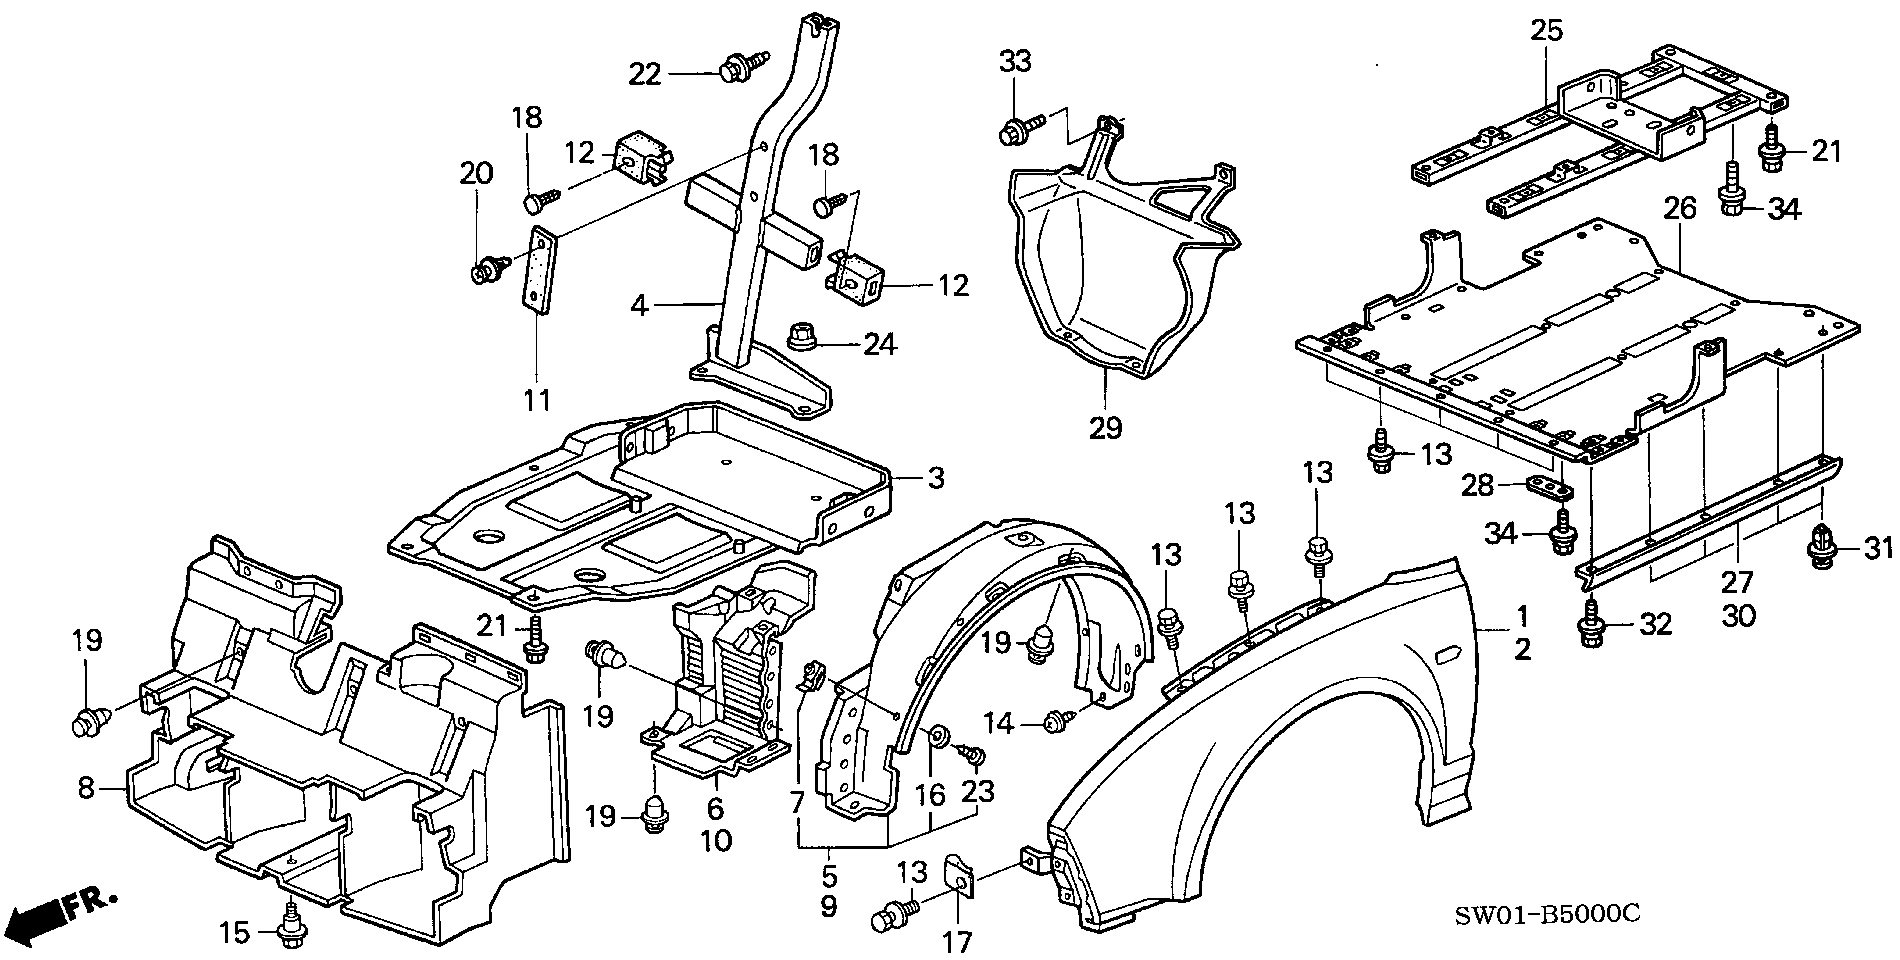
Front inner fender
Price at purchase (November 2015)
| No | Part Number | Part Name | Unit price | Quantity | Price | Remarks |
|---|---|---|---|---|---|---|
| 5 | 74101-SL0-030 | Fender, R. Front inner | 7,250 | 1 | ||
| 6 | 74102-SL0-Z10 | Cover, right front inner fender | 3,800 | 1 | ||
| 9 | 74151-SL0-030 | Fender, L. Front inner | 7,250 | 1 | ||
| 10 | 74152-SL0-Z10 | Cover, left front inner fender | 3,800 | 1 | ||
| Total amount | ||||||
All listed prices do not include tax.
Loading...
| No | Part Number | Part Name | Unit price | Quantity | Price | Remarks |
|---|---|---|---|---|---|---|
| 5 | 74101-SL0-030 | Fender, R. Front inner | 1 | |||
| 6 | 74102-SL0-Z10 | Cover, right front inner fender | 1 | |||
| 9 | 74151-SL0-030 | Fender, L. Front inner | 1 | |||
| 10 | 74152-SL0-Z10 | Cover, left front inner fender | 1 | |||
| Total amount | ||||||
All listed prices include tax.
※ Parts with no listed unit price were either discontinued or unavailable for order at the time of this survey.
※ Even parts with a listed unit price may have already been discontinued.
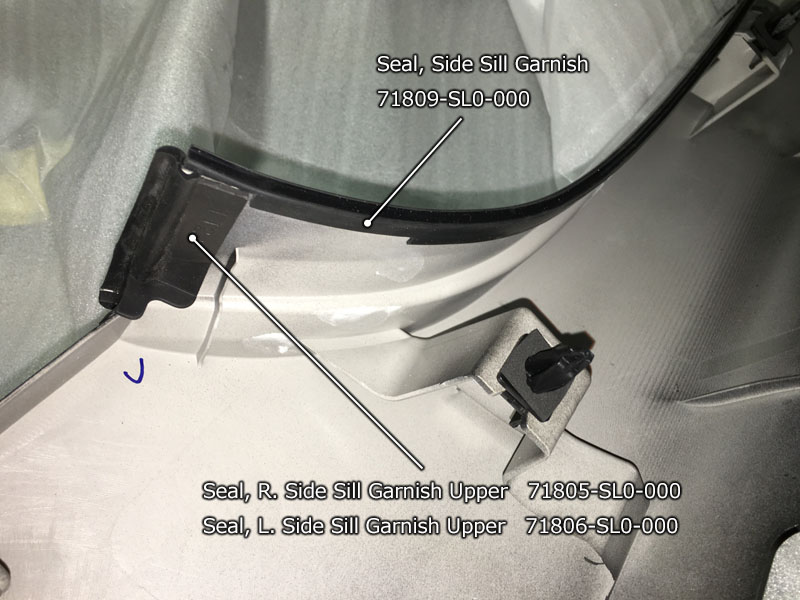
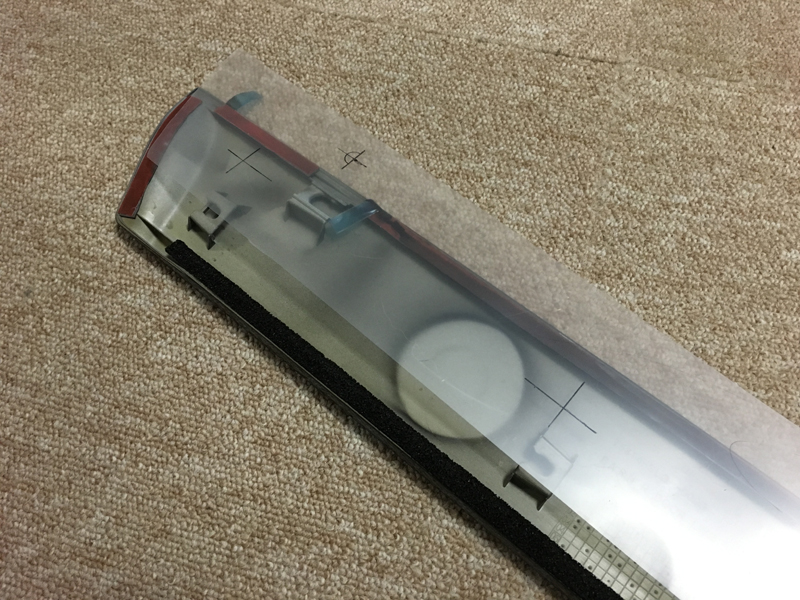
Sticking on stickers for the side garnish
- Attach the seal and upper seal to the side sill garnish. The side garnish seal was slightly too long, overlapping the upper seal, so I trimmed it for a better fit.
- Attach the side garnish separator to the side sill garnish. A positioning line seemed to be present, so I aligned the separator accordingly. There is a place to attach a clip under the side garnish separator, but I didn't want to drill a hole in the fender side, so I decided to attach it by just gluing the separator without attaching the clip.
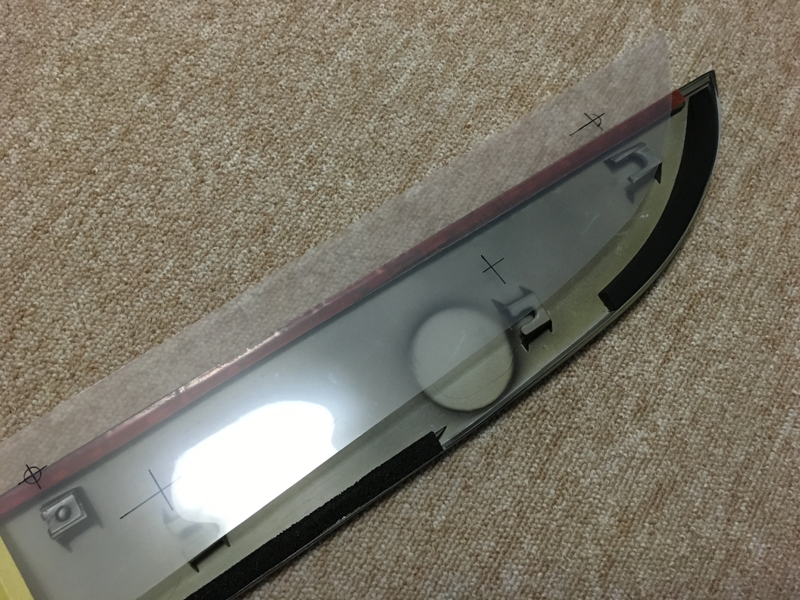
- Install the side sill garnish upper clips (9 per side).
These clips are fixed when pushed into the square holes,
and when removing them from the holes, rotate the clip 45 degrees to free the tabs and pull them out.
When removing the side sill garnish from the vehicle, slide it toward the front so that the clips remain on the vehicle side.
When installing, attach them to the side sill garnish beforehand.
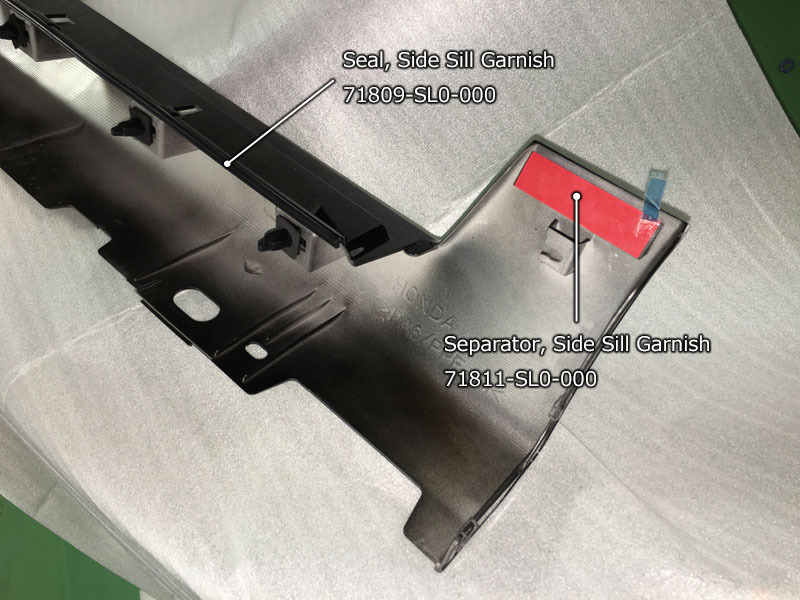
Attach the side garnish separator
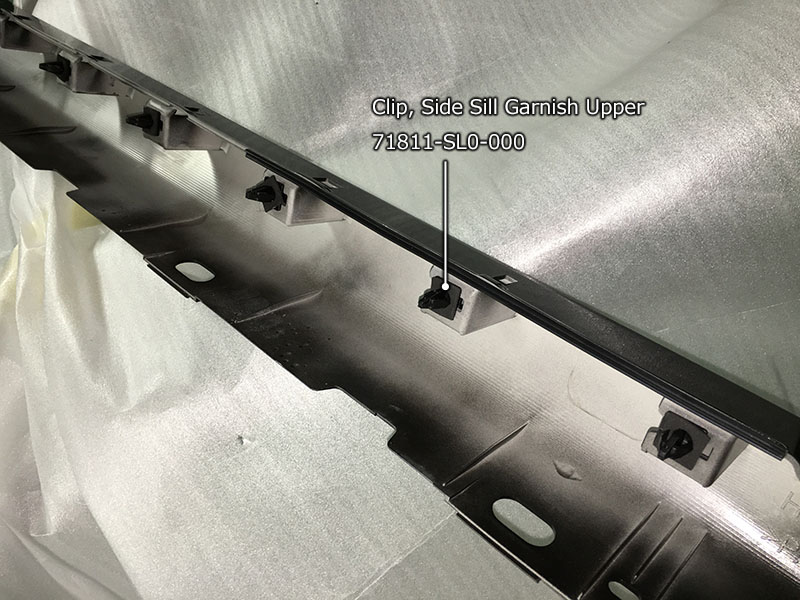
Side garnish upper clip installation
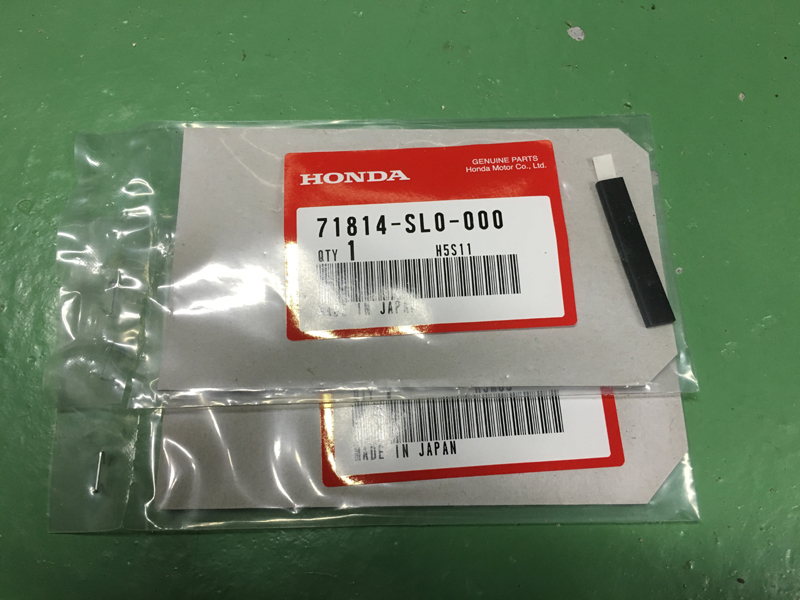
Lip, side sill garnish 71814-SL0-000
- I did not install the sticker called "Lip, Side Sill Garnish (71814-SL0-000)" because I was not sure where to attach it.
I obtained the December 2001 supplemental service manual and checked it, but the installation position of this lip is not described there either.
Looking at the diagram in the parts list, it looks like a sticker to be attached vertically to the door side of the side garnish separator, but it is clearly shorter than the vertical part on the door side and is not large enough to cover the whole area.
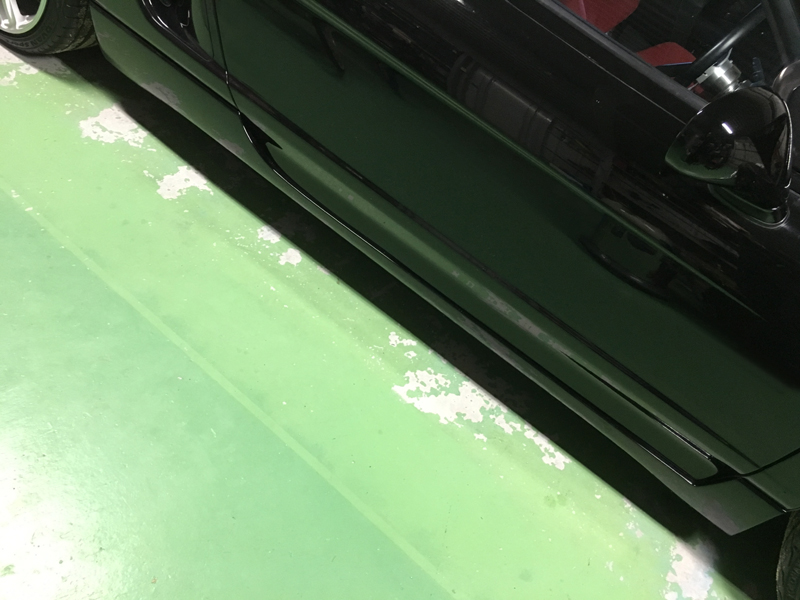
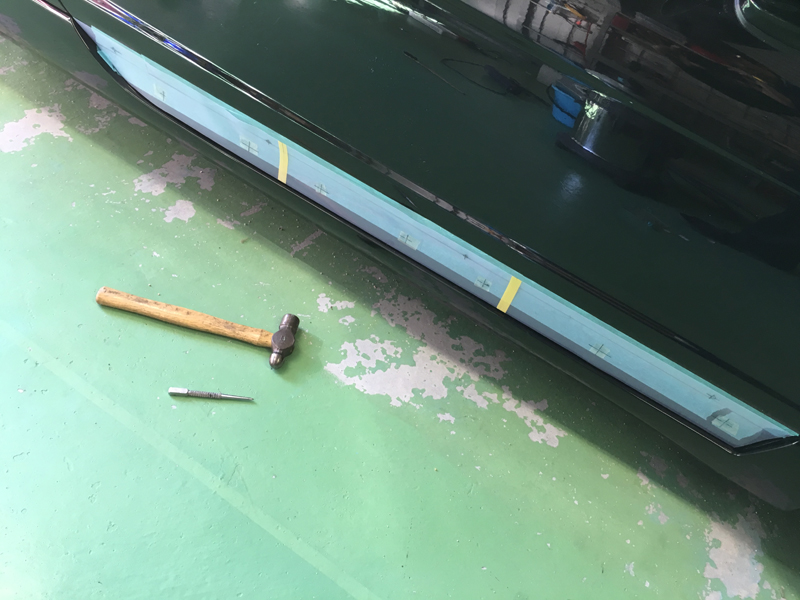
Only side sill garnish installed
- Attach the side sill garnish to the side sill. Like the early OEM version, it installs by simply pushing it in, but the later model also uses double-sided tape on the front fender via the garnish separator. The fit is perfect and there is no gap with the body. Since processing the door side is difficult, we considered not having the lower garnish, but it would not look very good. Most aftermarket products are installed using brackets or screws, but the OEM product is securely fixed with upper clips, so you can rest assured. Also, aftermarket products that are shaped to overlap the side sill on the body side have the disadvantage that sand gets in the overlapping area and causes scratches, but there is no need to worry about this with the OEM product.
Body-Side Processing Template
- The OEM lower garnish is fixed with 7 clips, 2 screws and 2 nuts from the inside of the door. Initially, I thought about attaching it with just double-sided tape, but there was almost no flat area on the back side, and it seemed like the tape alone would not be enough to hold it in place (the brown parts are the double-sided tape parts that are already attached). Concerned it might detach while driving, I opted to follow the OEM method and drill holes in the door panel after careful consideration. The only way to determine the hole positions is to make a mold from the lower garnish side. Since it would be impossible to mark the positions accurately unless the sheet is transparent, I made it by connecting three A3 clear files together.
- Clear sheet for making the front mold.
- Clear sheet for making the rear mold.
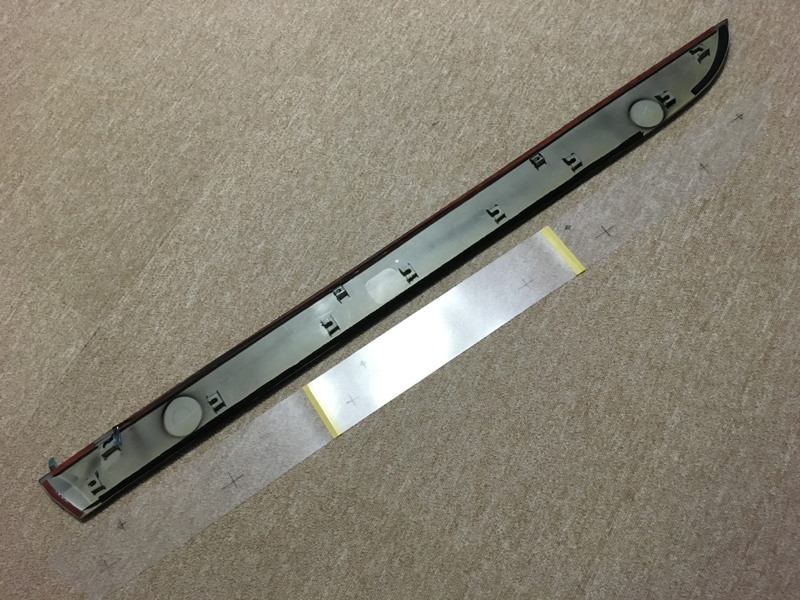
Pattern made from a clear file
Door side processing template (front side)
Door side processing template (rear side)
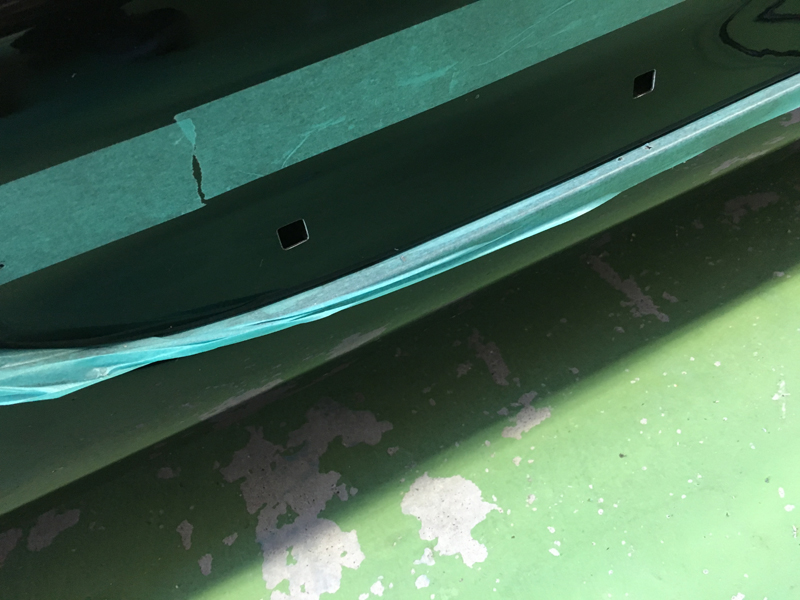
Clip Hole Shape: Square
The clip is 10mm square, and the mounting hole on the body is a square (※) that is 10mm long and 11mm wide.
By making the hole square, the clip's tabs become free when you rotate it 45 degrees, allowing it to be pulled out.
While a circular hole would suffice, we chose a square one like the OEM part to ensure proper sliding during removal.
*Matches with the upper clip fixing holes of the genuine side sill garnish.
- Attach the template to the vehicle and punch the holes. Even a 1mm misalignment in the vertical direction will cause the pattern to not fit, so carefully mark each hole.
Attach Template to Door for Drilling Holes
Marking the corners of the finished product
- Mark the finished squares according to where you punched the holes. To make it easier to see, I stuck masking tape on them, then cut them out with a utility knife and marked them.
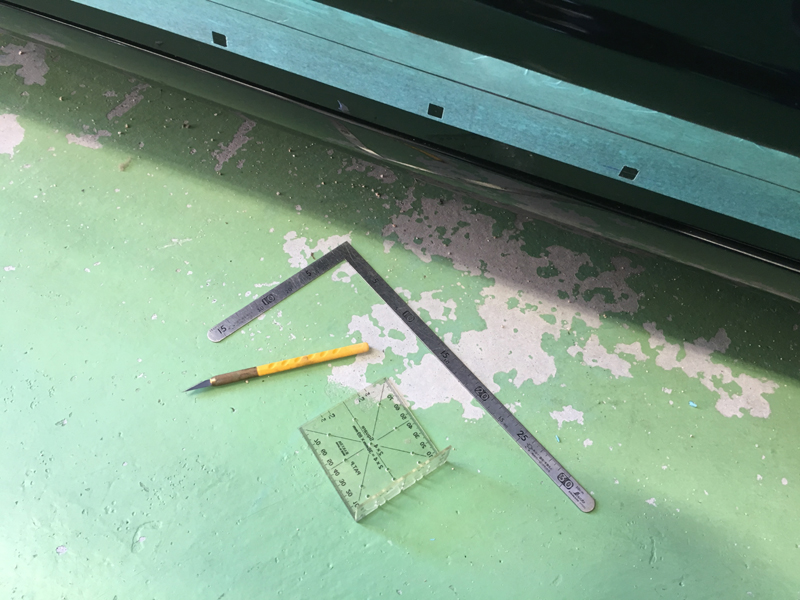
Create a square hole along the markings
- After drilling a φ8mm pilot hole to fit the punch, I simply used a file to enlarge it to a square. However, It’s questionable whether replicating the sliding function is worth the extra effort.
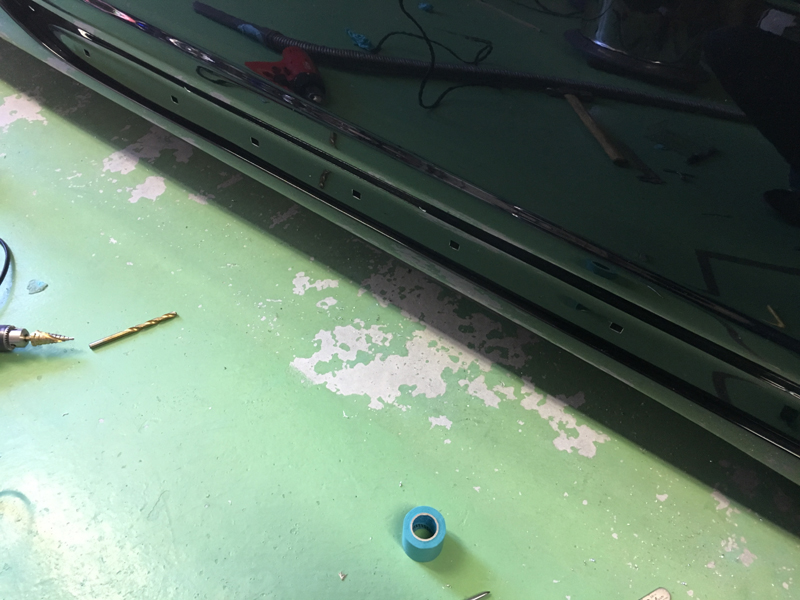
Door panel drilling completed
- Drilling is complete.
It's hard to tell from the photo, but there are two holes above the square holes through which the stud bolts of the lower garnish pass,
and two holes through which the screws pass.
The clips with square holes are designed to be removed just like the upper clips of the side garnish,
but the stud bolts are designed not to come off even if they slide sideways,
so if the mounting holes are perfectly round, they cannot be slid.
When I checked a photo of a later model door with the lower garnish removed that I found online,
I found that the holes for the stud bolts were indeed elongated holes. I don't think there's any need to think about removing them in the first place, but I made them elongated to match the genuine ones just in case. Processing the door side is quite a hassle, so unless you're really particular about using the genuine lower garnish, it may be more practical to use an adhesive-type aftermarket product.
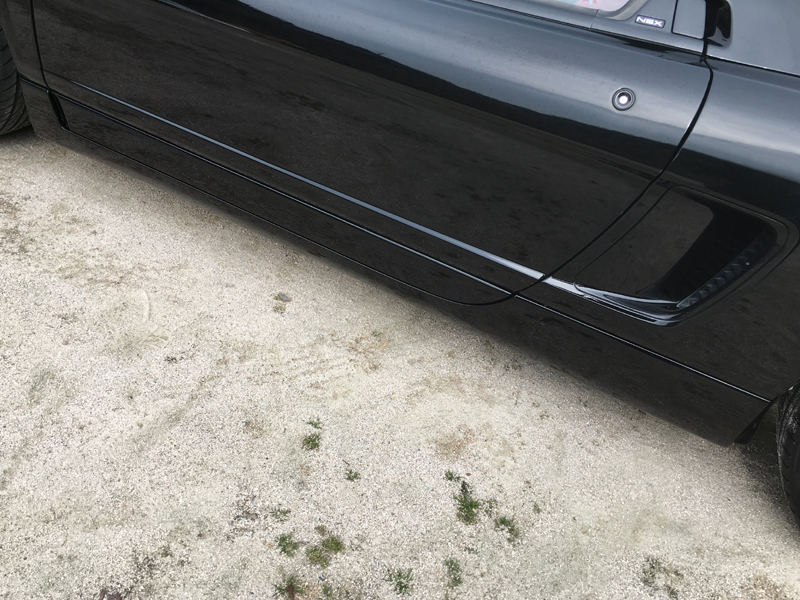
Side Sill and Lower Garnish Installed
Genuine, calm design
- The aftermarket product I had installed before had a sharp design, so it looked a little plain at first, but after a few days I got used to it and it looked better. The addition of the lower garnish gave the door a sense of volume, making the entire body appear slightly larger.
In addition, the side sill garnish is a later model, so there is a gap between the inner fender and the side sill garnish, so the inner fender was also replaced with the 02R version. For details on the inner fender replacement, see the report on 02R Inner Fenderopen_in_new.