Replace Bracket for Aftermarket
- I installed an aftermarket later-model rear skirt. The bottom of the later-model rear under is slightly lower than the earlier model, and there is a difference in the stays that support the skirt body. The stay that secures the center of the center stay of the early model does not reach the bottom of the later-model skirt. It is possible to force it into place by using a long bolt, but the angle is slightly different, so I replaced it with the later model. The later model was created by welding a U-shaped bracket onto the early model part.
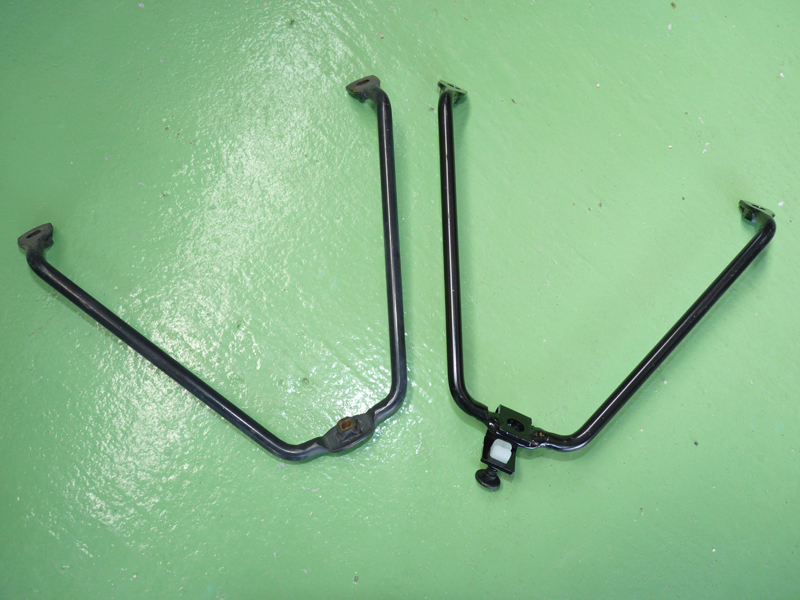
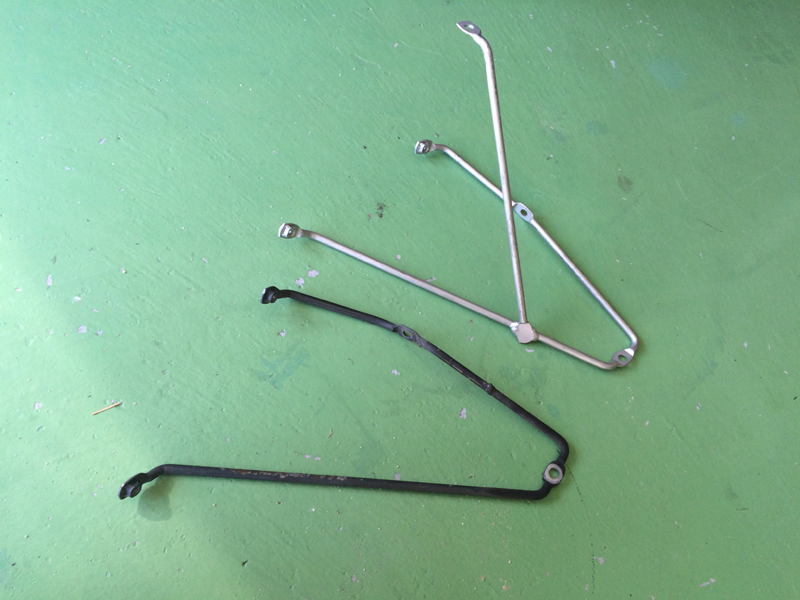
- The brackets that secure both sides of the rear skirt are also different for the early and late models. The silver one on top is for the late model, and the black one on the bottom is for the early model that was originally attached. The late model has an additional bar that extends downward that is not included in the early model. There is no big problem if you don't replace it, but I replaced it for added reassurance.
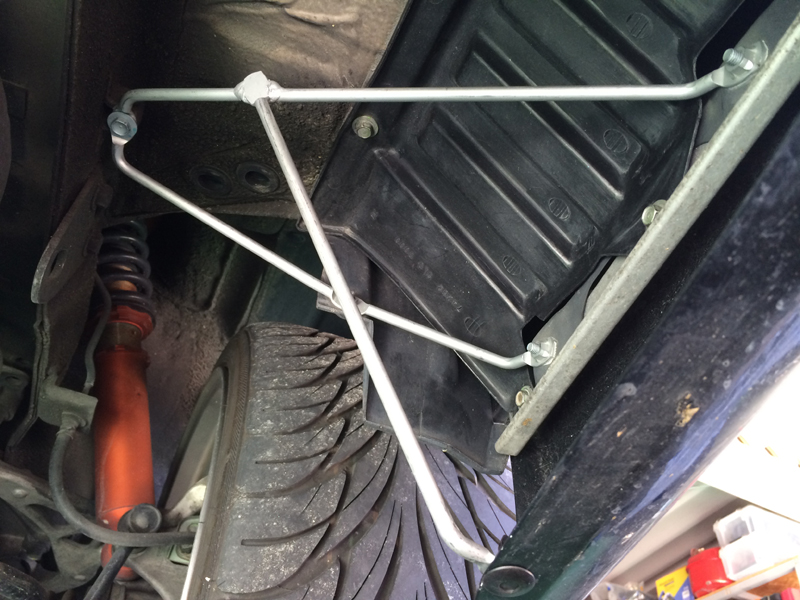
- The rear fender stay has been replaced with the later model. Unlike the earlier model, the rear skirt is firmly secured, reducing wobbling.
Early vs. Late Center Lower Stay Comparison
Early vs. Late Rear Fender Stay Comparison
After Installing Late-Model Rear Fender Stay
Loading...
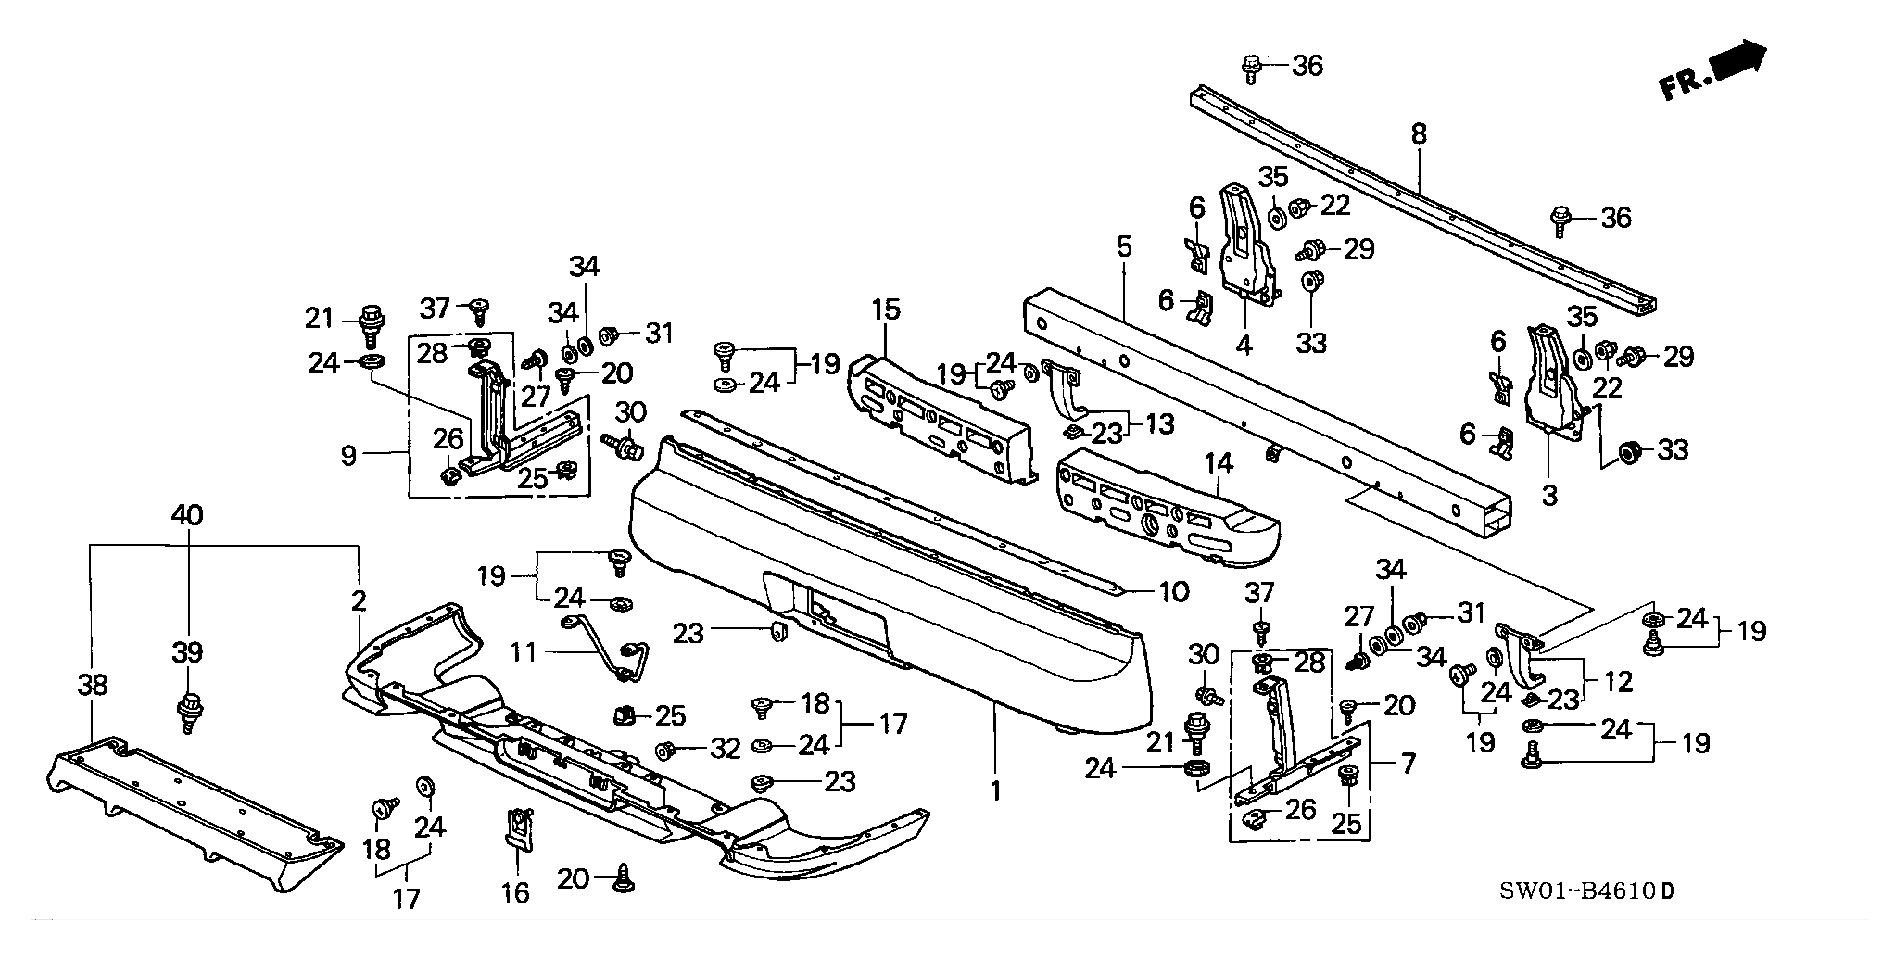
| No | Part Number | Part Name | Unit price | Quantity | Price | Remarks |
|---|---|---|---|---|---|---|
| 2 | 71511-SL0-000ZZ | Skirt COMP., rear bumper | 0 | |||
| 11 | 71555-SL0-010 | Stay, rear bumper center lower | 1 | |||
| 19 | 90110-SL0-000 | Bumper bolt assembly C | 2 | |||
| 20 | 90111-SL0-000 | Screw, corner slide tapping | 1 | |||
| 25 | 90661-SJ8-000 | Grommet, screw 5mm | 1 | |||
| 38 | 71515-SL0-Z10ZZ | Diffuser, rear skirt | 0 | |||
| 39 | 90149-SA0-003 | bolt, bumper | 9 | For NSX-R | ||
| 40 | 71511-SL0-Z10ZZ | Skirt COMP., rear bumper | 1 | |||
| 14 | 64412-SL0-305 | Stay, R. Rear Fender | 1 | |||
| 15 | 64812-SL0-010 | Stay, L. Rear fender | 1 | |||
| Total amount | ||||||
All listed prices include tax.
※ Parts with no listed unit price were either discontinued or unavailable for order at the time of this survey.
※ Even parts with a listed unit price may have already been discontinued.
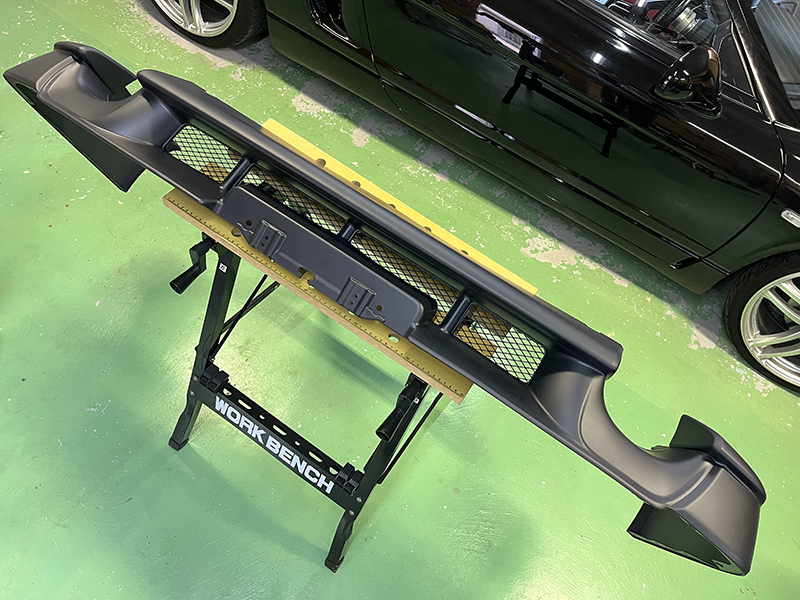
Skirt and Diffuser Also Genuine
- I happened to already have the diffuser alone, so I later purchased the rear skirt for the coupe to match it.
If you are buying a new one, the one-piece "71511-SL0-Z10ZZ" is cheaper and does not require any processing, so I don't think there is any point in buying them separately.
* If purchased separately:
92,700 yen (71511-SL0-000ZZ) + 98,000 (71515-SL0-Z10ZZ) + 1,575 (90149-SA0-003 x 9) = Total price: 192,275 yen - Some books say that this diffuser is made of dry carbon, but it is actually made of ABS resin and relatively heavy.
- The back side is stamped with "ABS".
SKIRT COMP., REAR BUMPER 71511-SL0-000ZZ
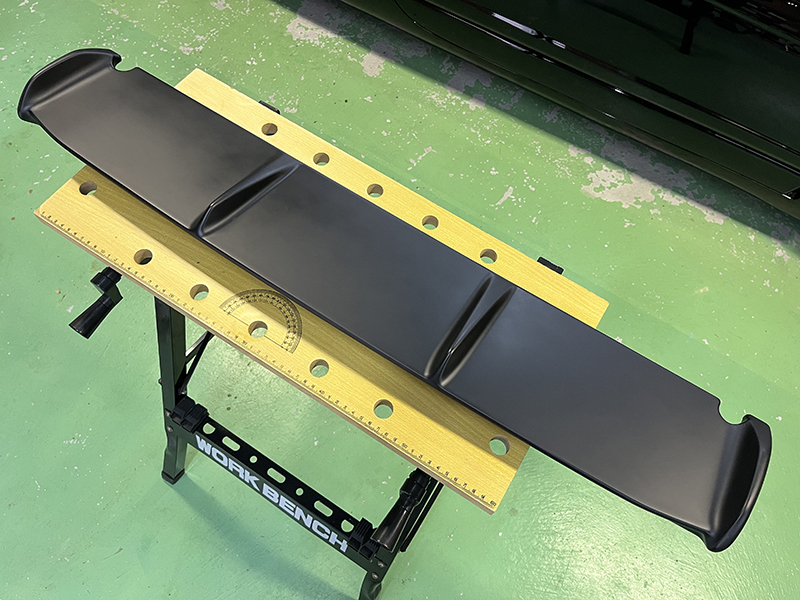
Diffuser, rear skirt 71515-SL0-Z10ZZ

Engraving on the back of the 02R diffuser
- The skirt alone has the same part number for all models in the parts search, but the skirt purchased separately (71511-SL0-000ZZ) does not have a hole for mounting the diffuser, so you need to drill a hole. In order to drill the hole in the exact position, I traced the diffuser's outline onto a clear file sheet. I used the product "Hikari PP Board Transparent P466-1 460 x 650 x 0.2mm" (181 yen including shipping on Amazon).
- Trace the hole positions of the diffuser on a sheet of clear file material and place it on the skirt. It will be easier to determine the overlapping position if you trace the outline of the diffuser itself and use the positions of the two cutouts on the front of the vehicle as a reference.
- After drilling the holes. Because it is ABS resin, the cut surface is prone to fraying. It will not be visible after the diffuser is installed, but I smoothed it out with paper just to be safe.
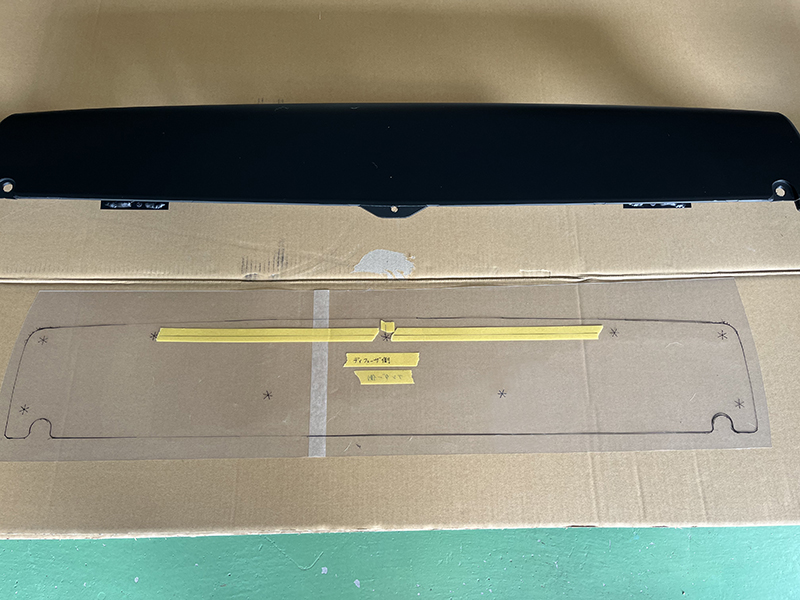
Pattern made from clear file material (PP)
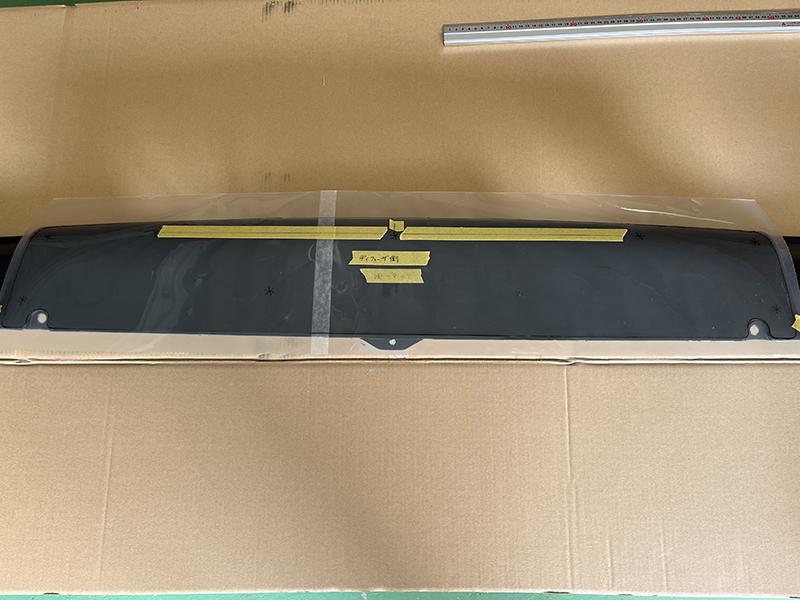
Attach the pattern to the skirt
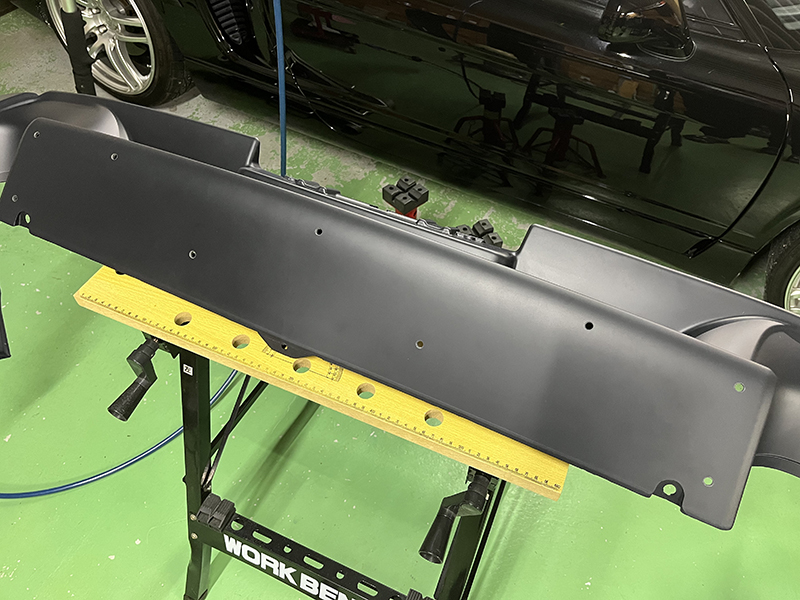
Holes in the skirt completed
- The diffuser was temporarily fixed with suitable bolts. It was carefully positioned, and it fit perfectly with the shape of the skirt. The surface of the new diffuser and skirt is not solid resin, but has a beautiful texture and is painted with a matte black finish. I tried to identify the official color of the painted parts of the diffuser and skirt, but I couldn't find out. However, when I actually saw the new genuine product, I thought that the color I saw when I bought it was the genuine color I saw in catalogs and books, so I decided to leave it as it was.
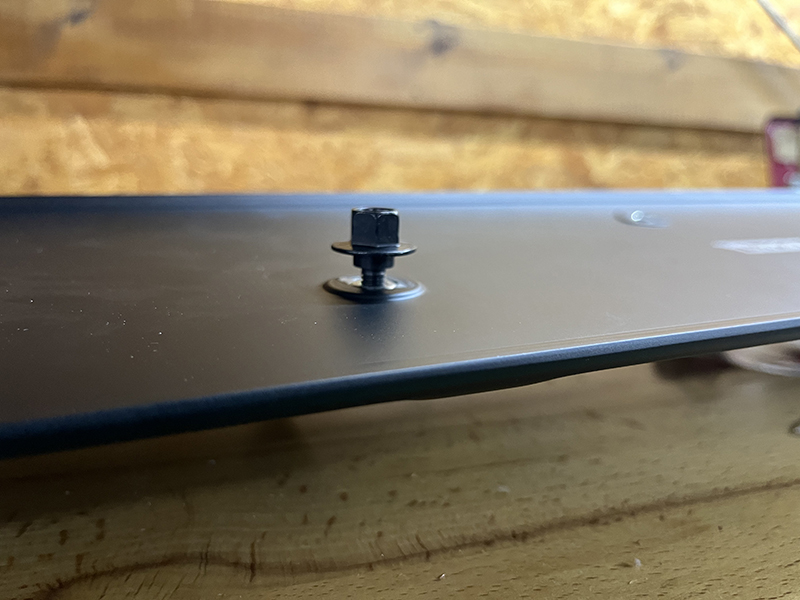
- Looking at the genuine bolts I purchased at the same time, I noticed they had a stepped structure and the overall length to the integrated washer was quite long. The mounting holes on the diffuser side were not that deep, so I felt like I could tighten them all the way.
- When I tried installing the original bolts, I found that I couldn’t tighten them enough for the washer to sit flush with the skirt. The stepped part didn’t make proper contact either.
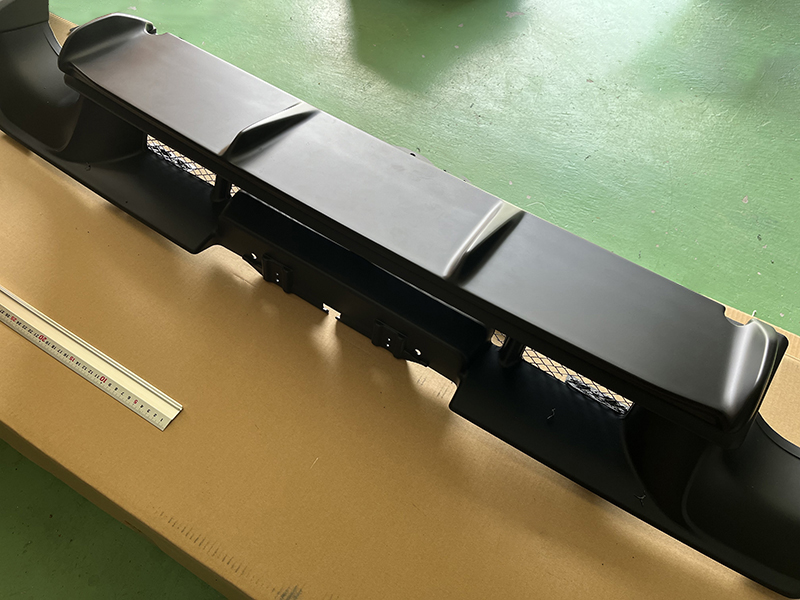
Temporarily attach the diffuser to the skirt
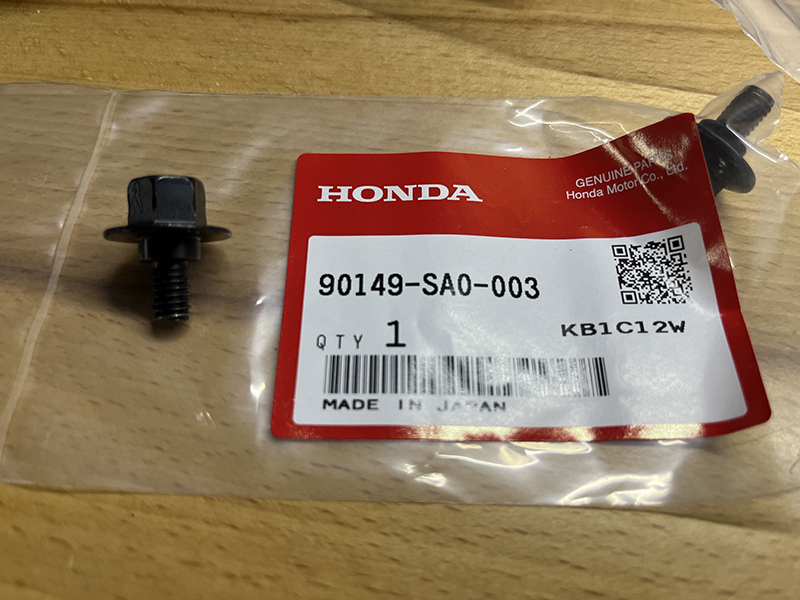
Genuine mounting bolt 90149-SA0-003
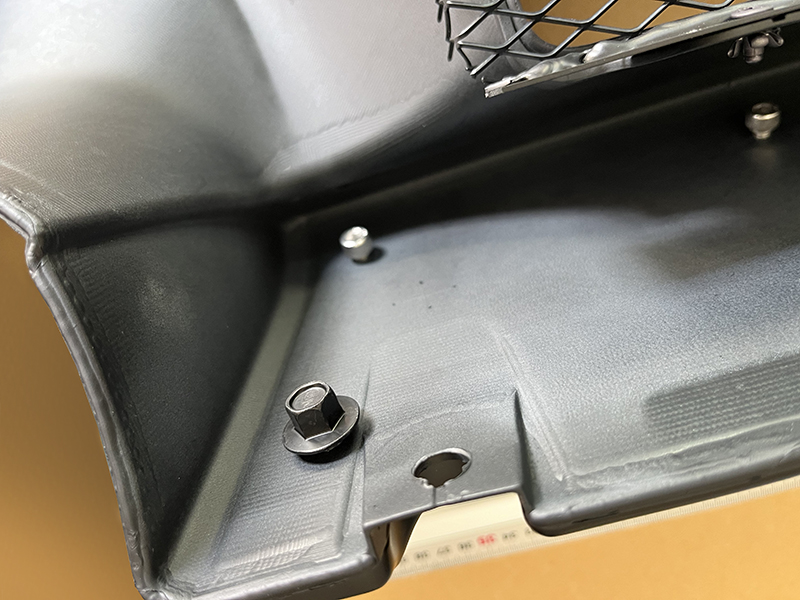
Genuine Bolts Tightened Until Bottomed Out
- Even when I attached the bolt to the diffuser and tightened it until it bottomed out, it still stopped with a lot of the thread remaining. ...I thought I might be able to tighten it further by forcing it, but I gave up, since I didn't want to penetrate the sealed internal structure of the diffuser. After doing some research myself, I found many photos of genuine diffusers that have drainage holes on the bottom (road surface side). My diffuser doesn’t have any drainage holes. Perhaps the ones that do have such holes are designed for bolts to pass through, but I haven’t been able to confirm this.
Diffuser alone, tightened until it bottoms out
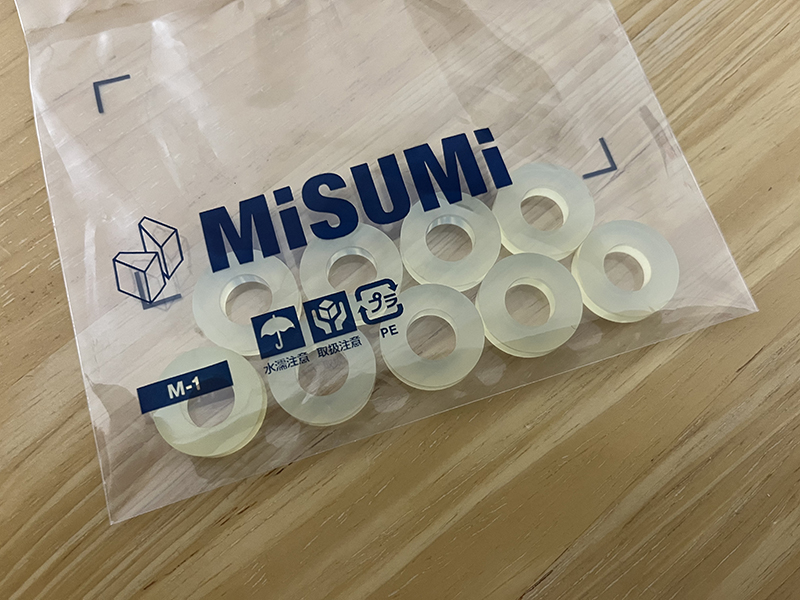
Misumi Urethane Washer URWS20-10-5
- Since I had the chance, I decided to use the genuine bolts I had purchased and solve the problem by inserting washers into the gaps.
When I looked at the bolt seating surface on the rear underside, I found that there were curved areas, so I decided to insert a 5mm thick urethane washer.
I used Misumi's urethane washer (free-spec type):
URWS20-10-5open_in_new The hardness selected is the hardest, Shore A95. - The gap that occurred when it hit the bottom was about 4 mm, so I reduced it by 1 mm and it feels just right.
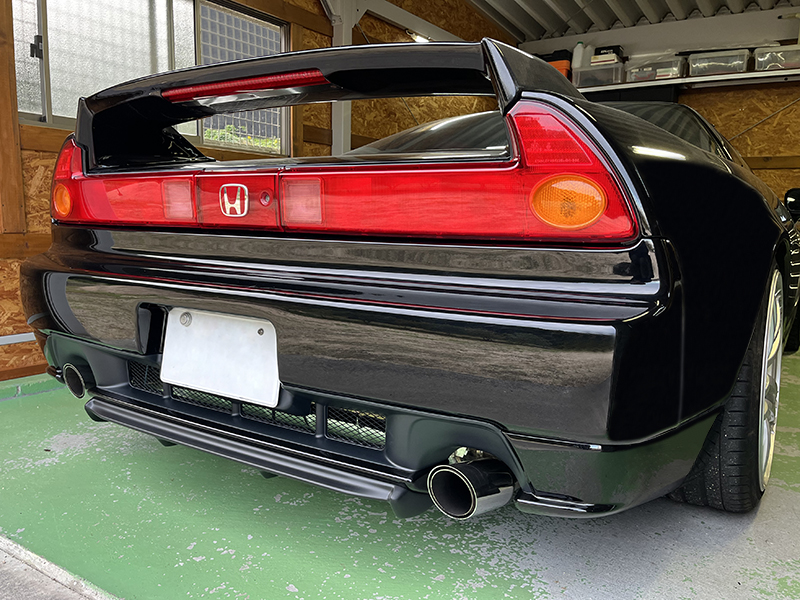
- Installation complete. Now, all the exterior parts are genuine except for the hood and rear spoiler.
If the inner fender is left as it is for the early model, there will be a small gap, so the inner fender is also replaced with the later model.
For details on the inner fender replacement, see the report on the 02R inner fenderopen_in_new. Since the rear spoiler is made of wet carbon, I’d eventually like to replace it with a dry carbon one, even though using the original may not be possible.
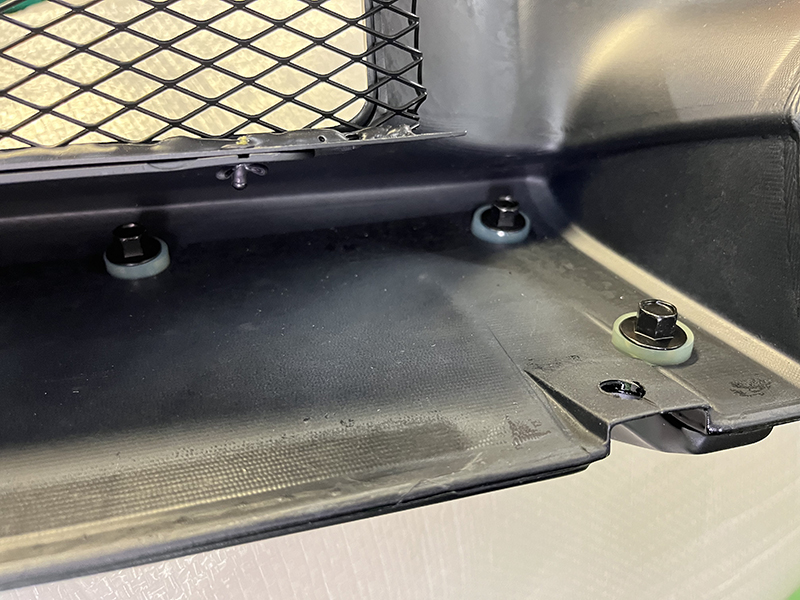
Attach Genuine Bolts with Urethane Washers
02R Skirt and Diffuser Installation Completed
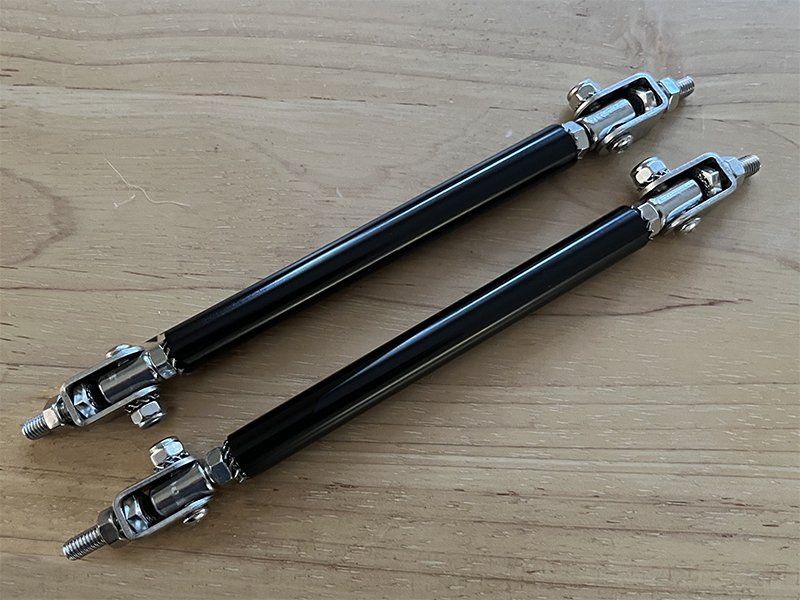
Turnbuckle type stay rod
- There was no problem when it was made of FRP, but after replacing it with the genuine part and installing a diffuser, the weight increased, and it became quite wobbly without a rain hose. I didn't want to install a rain hose, so I was thinking about whether I could support it with some kind of stay, and then I found a perfect hole in the body just above the support hole in the skirt. It seemed like I could extend the stay from this hole and secure it in place. The rod I purchased is an adjustable rod sold on Yahoo! Auctions and other sites under the names "stay rod" or "connection rod." The product has a total length of 175mm to 220mm, with a turnbuckle part (the black pipe part) of 150mm, and all the screws are M5.
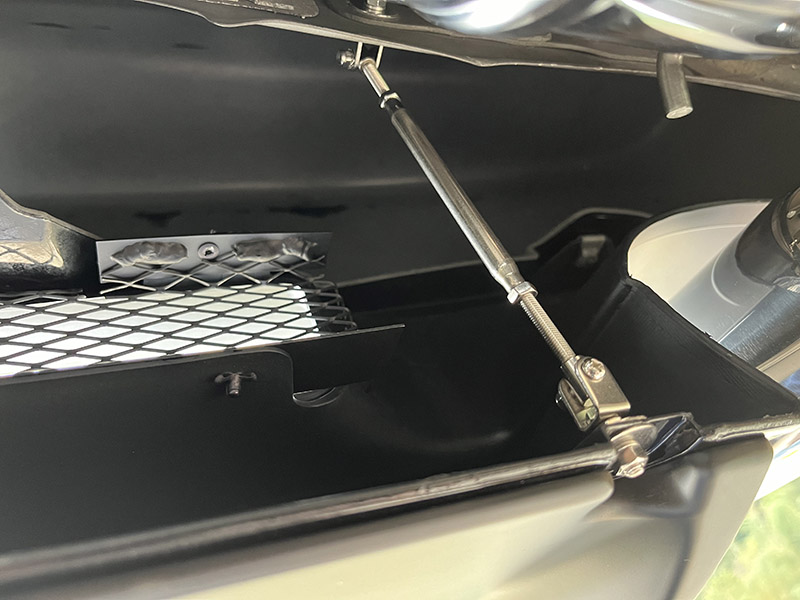
Skirt reinforced with stay rods
- Installation complete. The wobble that was there before installation is completely gone.
The stay rod I used has an aluminum pipe covering the turnbuckle in the center, but this aluminum pipe and turnbuckle spin freely,
making it very difficult to adjust the length and tighten the fixing nut (it is impossible to adjust the length while rotating the center).
It still looks fine without the aluminum pipe, and can be securely fixed, so I used it with the aluminum pipe removed.
According to the 02R press informationopen_in_new , this diffuser reduces aerodynamic drag by improving airflow at the rear and underbody, resulting in a Cd reduction of −0.003, and also provides a negative lift effect with a Clr reduction of −0.002.
Reference: Content from the 02R Press Informationopen_in_new
Aerodynamic mechanism for generating negative lift using an air duct in the hood
At the rear, negative lift can be obtained efficiently by using a wing-type spoiler.
However, at the front, installing large aerodynamic devices makes it difficult to maintain the minimum ground clearance and approach angle.
In addition, various difficult challenges must be overcome in order to achieve negative lift on a production vehicle, such as reduced acceleration performance caused by increased aerodynamic drag.
Therefore, a method was adopted in which the underside of the body was flattened so that airflow could pass smoothly without reducing its velocity beneath the vehicle, thereby generating negative lift.
This approach makes it possible to secure both the minimum ground clearance and the approach angle while minimizing any increase in frontal projected area.
However, this created a new issue: how to discharge the airflow that had previously passed through the radiator and been routed under the body.
As a result, negative lift was achieved without sacrificing top-speed performance by suppressing aerodynamic drag through avoiding the use of large aerodynamic add-on devices and by making effective use of the base NSX styling.
Furthermore, wind tunnel measurements of the actual vehicle confirmed that lift generated at the moment the vehicle begins to yaw is effectively reduced by the longitudinal fins on the underbody, which function in a manner similar to a chin spoiler.
This characteristic also contributes significantly to improvements in transient handling performance.
This issue was resolved by taking advantage of the characteristics of the midship layout, installing an air duct on the hood, and discharging the airflow through it. Furthermore, vertical fins were installed on both sides of the front under cover to suppress airflow beneath the body from entering the wheel housings. In addition, partitions were installed on both sides of the air duct to prevent airflow passing through the duct from flowing into the wheel housings. Moreover, the opening ratio of the front bumper was reduced to suppress the inflow of air itself as much as possible. As a result, the airflow beneath the body and inside the hood was finally smoothed, generating the targeted negative lift.
Cd value (drag coefficient)0.32
Cl value (lift coefficient / total)-0.100
Clf value (lift coefficient / front)-0.040
Clr value (lift coefficient / rear)-0.060
Compared with the first-generation NSX-R, this corresponds to an increase in tire contact load equivalent to 16.3 kgf at the front and 24.5 kgf at the rear (both measured at 180 km/h).
| Effect | Achieved Value | |
|---|---|---|
| Carbon hood with air outlet duct | Upward airflow rectification | Clf value: -0.025 |
| Radiator exhaust duct inside the hood | Upward airflow rectification | Clf value: -0.010 |
| Front under cover with fins | Rectification of forward and underbody airflow | Clf value: -0.040 |
| Reduced front condenser opening area | Rectification of frontal airflow | Clf value: -0.025 |
| Carbon rear spoiler | Rectification of rearward and upper airflow | Clr value: -0.100 |
| Rear diffuser | Rectification of rearward and underbody airflow | Clr value: -0.002 (Cd value: -0.003) |
※ Values measured by Honda