

Genuine center console panel
- Although the dimensions of the genuine BOSE head unit are close to 2DIN size, the center console window is separated to accommodate the head unit's display and buttons, so it will not fit aftermarket head units.
While it's possible to find a deck that fits the larger window, it seems like it would be better to simply cut it out. I
didn't think much of it at the time, but considering the price of a new one, it takes a lot of courage to do so. The ashtray part is divided into three parts: the ashtray (inner), the frame (outer) into which the ashtray fits, and the decorative panel, but these are also quite expensive (see reference prices below for current prices).

Console Panel vs 2DIN Size
- Comparing the center console window with the 2DIN size.
If cut to the exact 2DIN size, the bottom of the panel would be quite thin and prone to damage.
If you secure the head unit using KSP Engineering's stay kit, the surface of the display and control panel will be at the same height as the surface of the center console. The display and control panel is slightly smaller than the main unit, so adjusting the opening to this size should provide ample space for the panel's framework.
The actual dimensions of the display and control panel for the Carrozzeria FH-770DVD were measured at 170mm W x 95mm H (blue square).
Loading...
| No | Part Number | Part Name | unit price | quantity | price | remarks |
|---|---|---|---|---|---|---|
| B37.40-9 | 77296-SL0-010ZA | Panel, center console *NH1L * | 1 | |||
| B37.40-11 | 77710-SL0-A01 | Inner COMP., front ash tray | 1 | |||
| B37.40-13 | 77731-SL0-013 | Outer COMP., ash tray | 1 | |||
| B37.40-14 | 77732-SL0-A01 | Panel, ashiyu tray | 1 |
All prices shown include tax.
*Parts with blank unit prices are either out of production or unavailable for order at the time of the survey.
*Even if a part has a unit price displayed, it may no longer be in production.

The originally rejected 1DIN specification
- At first, I was thinking of installing a 1DIN head unit, so I reused the cut-off frame scraps and smoothed out some parts. I tried to create a small window in the remaining space underneath to mount other electronic parts, but it somehow felt unsightly, so I decided to use a 2DIN head unit.

Panel joints are shaped like an L-lock
- If the audio panel could be separated, it would be much easier to maintain, so I decided to cut it below the ashtray and split it into two. After cutting the panel, I used polyester resin to mold the panel around the shifter to add an L-shaped locking feature to the joint between the panels.

Split upper panel smoothing
- All audio-related windows have been smoothed.
I wanted to reshape the frame of the A/C control unit to have an edge, so I marked it to indicate the reference position on the outside.

A/C control unit frame edge processing
- It's hard to see in the photo, but the frame has been given an edged shape. The original roundness has been removed to make the frame thinner, so the back is reinforced with polyester resin.

Processed Panel Painted with Primer
- After adjusting the shape of the L-shaped locking part that connects the top and bottom panels, both the top and bottom panels were painted with primer.
Although it is not clear from the photo, a hole was drilled in the L-shaped part of the lower panel to allow a bolt to pass through from below. By drilling a hole in the upper panel as well, the lower bolt acts as a connecting pin and fits into place.

Modified to mount a head unit and φ52 meter
- The audio section was cut to the size of the display and operation section of the head unit, and the part that was an ashtray was reshaped to mount a φ52 meter so that the A/F meter could be set in.
Mounting the meter on a flat surface would look unsightly, so a female mold was made and used to cut out the meter, creating a shape that would sink in about 5mm.

Custom Reinforcement Aluminum Brackets
- The ashtray frame (outer component, ash tray) also serves as a bracket supporting the console panel, but since it is removed along with the ashtray, we made a replacement bracket out of 1mm thick aluminum plate.

Completed console panel painted piano black
- I wondered what kind of finish to use, but I decided to paint it in piano black (a thick clear coat with a black base), which was popular at the time. I
also painted the frame of the air conditioner vent in the same color.

NSX-R shift boot and tray
- In conjunction with the console panel modification, the shift boot and the tray attached to the switch panel for the antenna switch, etc. will be replaced with those for the NSX-R. The shift boot is for the 02R (83413-SL0-Z01ZA), and the tray is a common part for the 92R and 02R (77298-SL0-A-00ZA).

NSX-R shift boot and tray integrated into panel
- The console panel is fitted with a custom-made aluminum stay, and the NSX-R shift boot and tray are installed.
The L-shaped part of the panel joint was further shaved down to create clearance for installing the meter.
Loading...
| No | Part Number | Part Name | unit price | quantity | price | remarks |
|---|---|---|---|---|---|---|
| ZB37.40-23 | 83413-SL0-Z01ZA | Boots, change lever *NH1L* | 1 | For 02R, discontinued | ||
| ZB37.40-60 | 77298-SL0-A00ZA | Panel, tray *NH1L * | 1 | 92R, 02R common |
All prices shown include tax.
*Parts with blank unit prices are either out of production or unavailable for order at the time of the survey.
*Even if a part has a unit price displayed, it may no longer be in production.
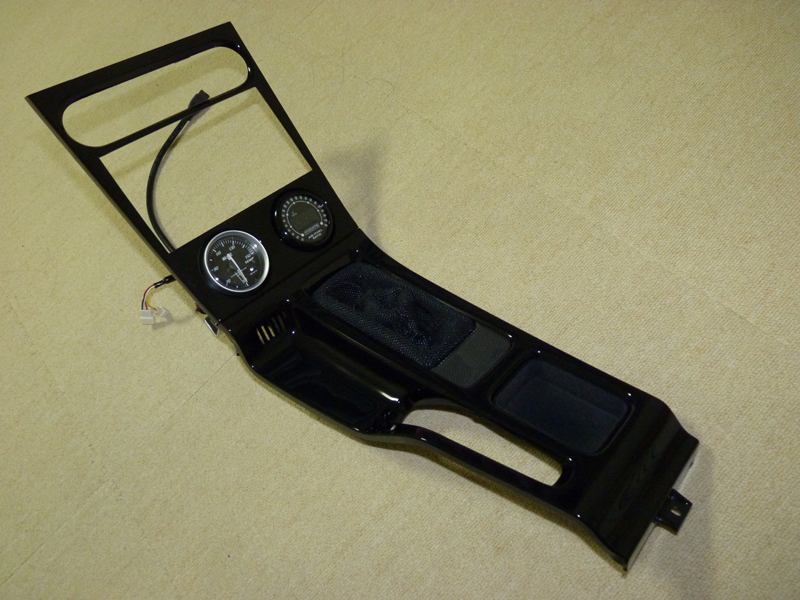
Console panel with interior air sensor
- The inside air sensor (aspirator assembly) is fixed to the frame (outer comp., ash tray) where the ashtray fits.
Since the entire frame needs to be removed to mount the meter, only the inside air sensor stay was cut out from the frame and fixed to the console panel.

Console Panel Test Fit with NSX Meter
- I temporarily fixed the meter and
temporarily assembled the upper and lower panels. Other than the A/F gauge that I had originally planned to embed, there was nothing else I really needed, so I installed a water temperature gauge.
I narrowed my search to products with orange lighting and chose the BLITZ RACING METER SDopen_in_new.
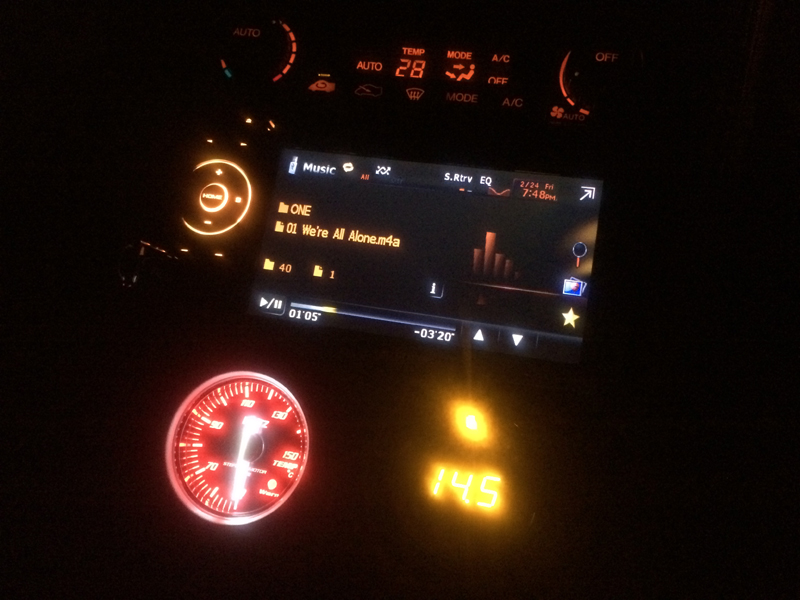
Installing modified console panel in vehicle
- When I installed it on the car and checked it, I didn't notice the split parts at all. It's hard to tell from the photo, but the actual piano black is much glossier.
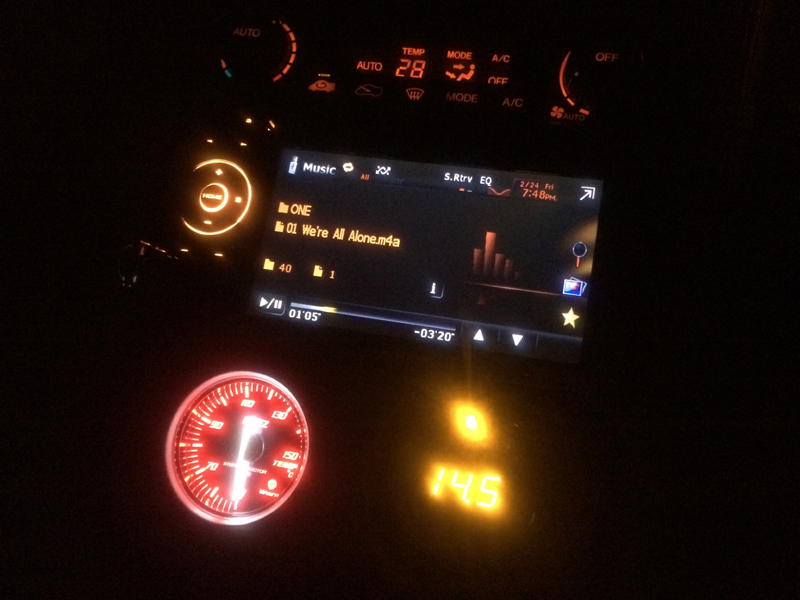
Illumination Color Check
- Although the illumination color is unified in orange, which gives it a sense of unity, the new electronic devices are still very bright, making the original A/C control unit appear quite dim.